Happy April, friends ~
Like many of you with extra home time during the COVID-19 pandemic, our family is embracing the opportunity to tackle projects large and small around the house. Perfect for me because I absolutely love house projects; not so perfect for my long-suffering family.
I’ve found baked goods to be a wonderful motivator.
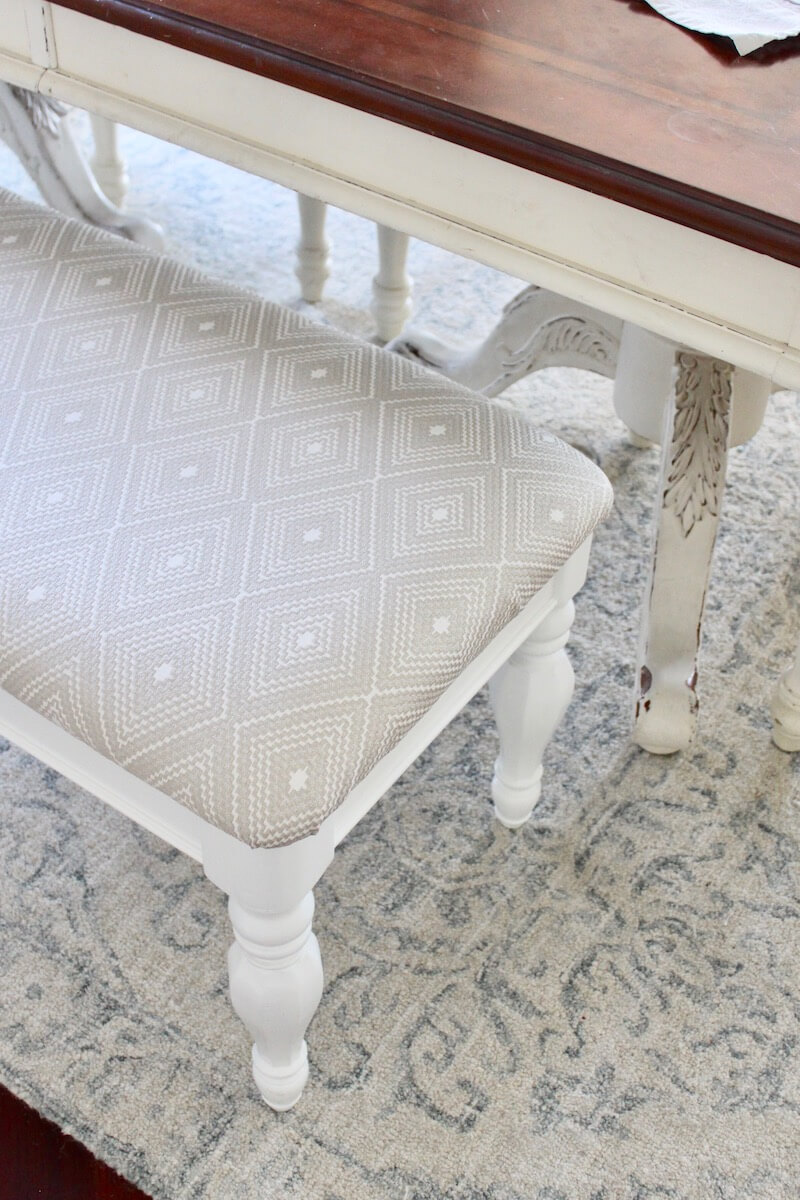
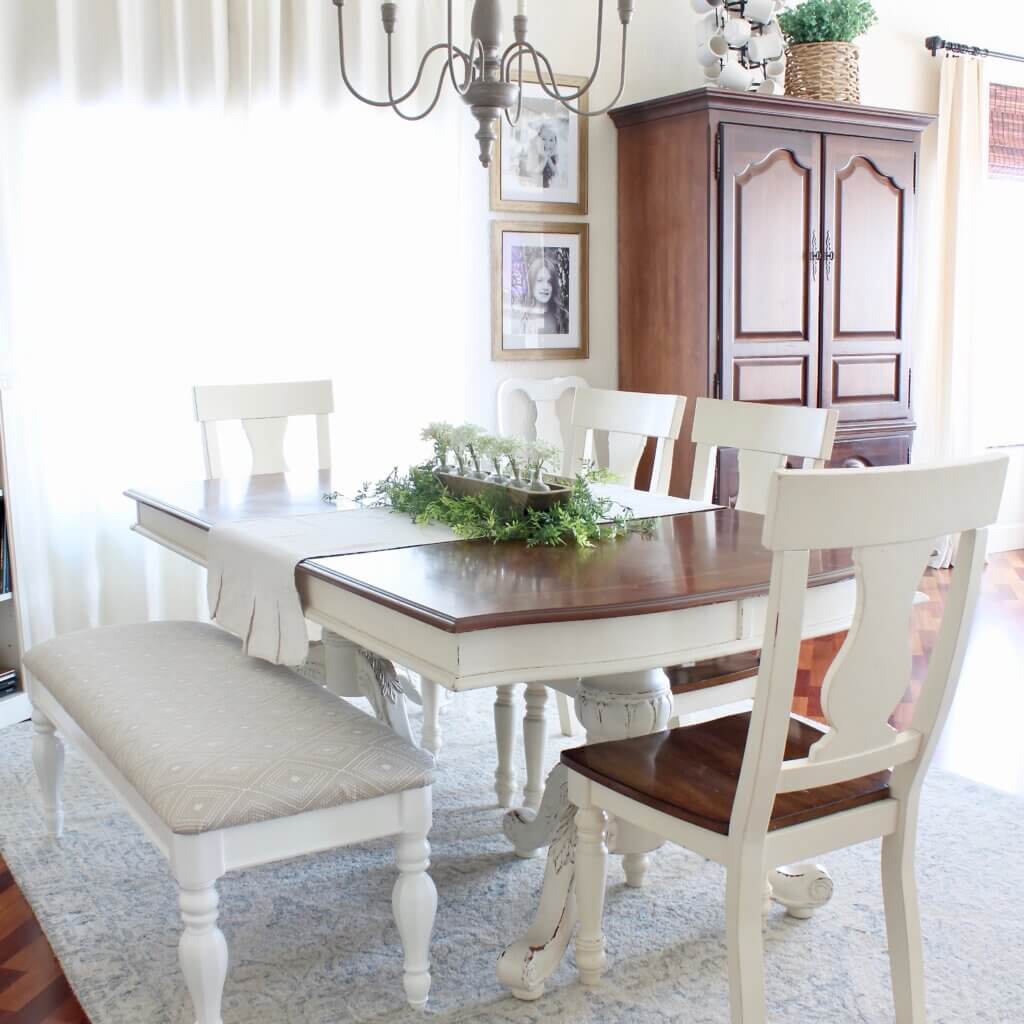
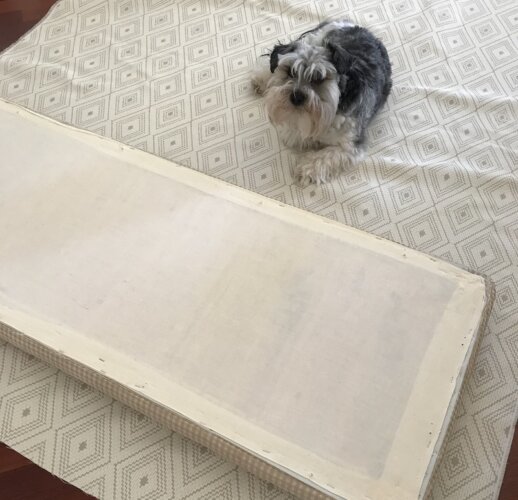
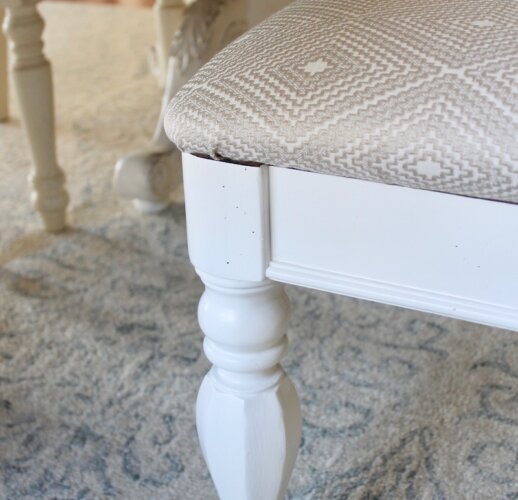
One small project I tackled is this upholstered bench; I love the variety of different seating around a dining table and thought this bench would bring a refreshing change to our dinner gatherings.
Side note: Now I’m itching to give my old table and chairs a fresh coat of white paint; the original shade was Benjamin Moore’s Bone White, a much creamier color.
The main reason I put off tackling my bench project is this:
Oil-based paint.
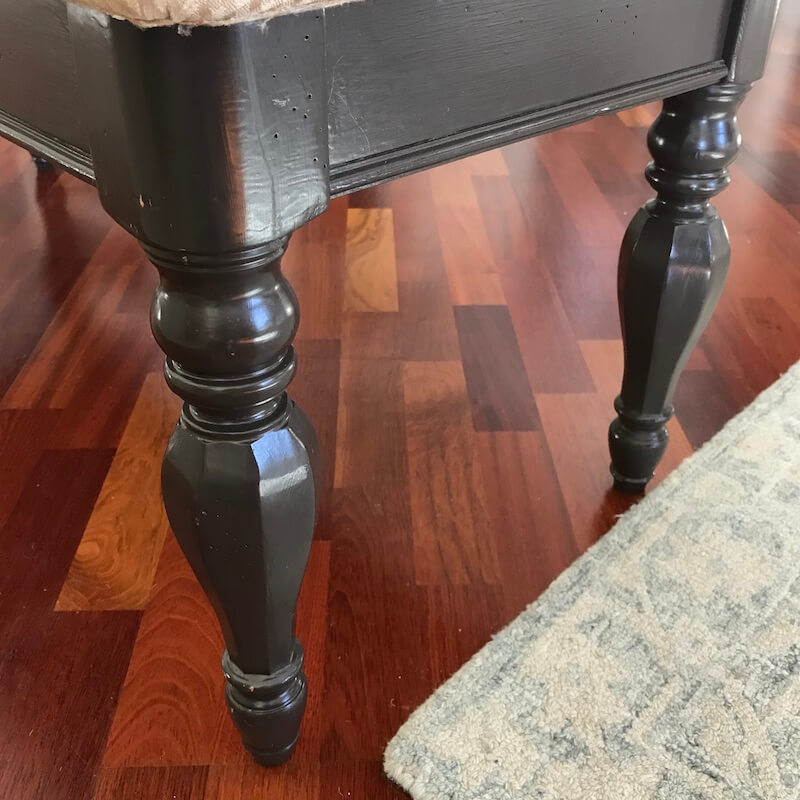
Yep, in all its shiny, gloppy, slippery glory. Unlike water-based paint, oil-based can be stubborn because it repels my normal stash of latex or chalk paints. I could, indeed, scuff it up a bit and apply a new shade of oil-based paint, but I don’t often work with oil-based paint due to odor and clean-up, and I rarely have any on hand.
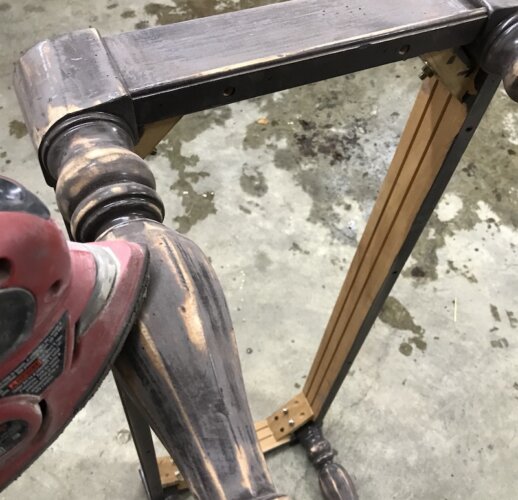
Repainting this bench meant extra steps. Like extra sanding. And priming.
Certainly not the end of the world, but definitely more laborious and time consuming given the turned (rounded) legs.
Lucky for me, social distancing afforded me all the time and space I needed to finally dive in.
But first: Reupholstering the stained seat.

I found this upholstery fabric at JoAnn’s for 30% off. Not one of their best sales ever, but I was frankly thrilled the store was open considering all the business closures this spring. (The clerk told me JoAnn’s is considered “essential” due to its stock of homeschool supplies. Clever, JoAnn.)
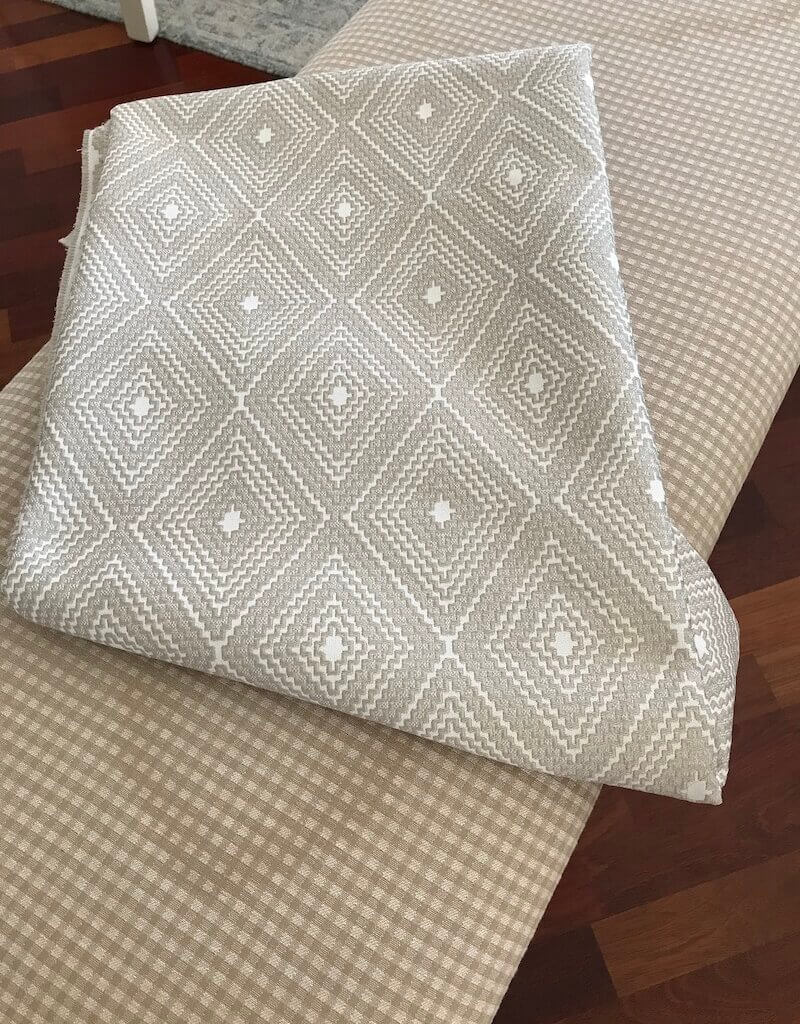
I didn’t bother to wash the fabric first, primarily because I wanted to jump right in, but also because upholstery fabric arrives from the manufacturer with a coat of protectant already on it. Win for me!
Here are the steps I took to update the upholstery:
- After unscrewing the upholstered top from the bench’s frame, I spread my new fabric on the floor and positioned the seat on top of the fabric, paying special attention to the fabric’s pattern alignment before cutting.
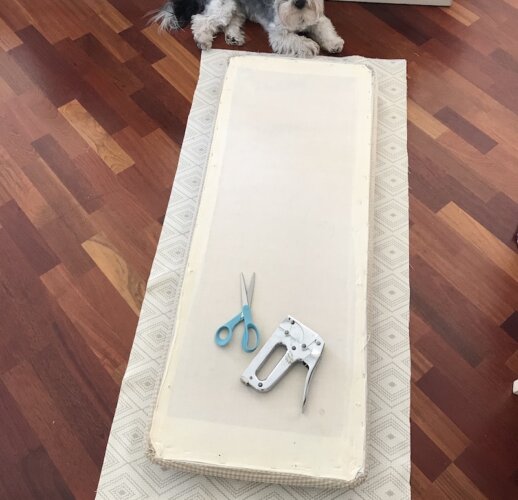
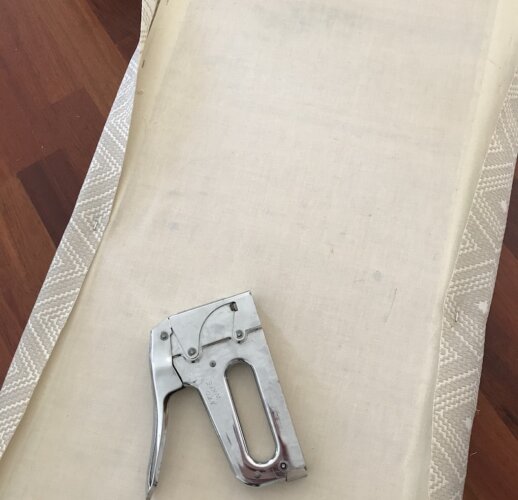
- Using fabric scissors, I cut around the upholstered top leaving enough extra to wrap the fabric up over the seat for stapling.
- Using an old-fashioned hand stapler (I also frequently use a pneumatic stapler like this), I began by placing a staple in the middle of one long side, pulling taut before stapling a second staple in the middle of the opposite side. I like to start my staples on the sides because these two staples help hold the fabric in place as I continue stapling around the seat.
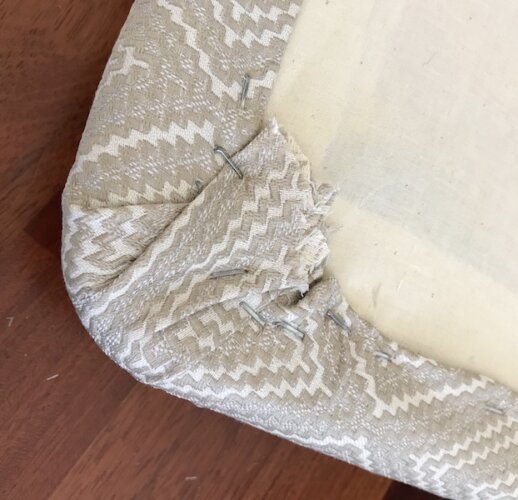
- My corners are not always pretty, but I do my best to avoid visible wrinkles and seams by pulling little sections of fabric at a time and stapling each section as I work my way around the corners.
Here are the steps I took to paint the base:
- Sand, sand, sand. I used a mouse sander similar to this. It’s important to sand all the ‘shiny’ off the piece for best adhesion of a new paint layer. My goal was to scuff it up and create as much tooth as possible.
- Next, I applied a layer of primer. In the picture below, you’ll notice my primer coat is gray. Yep, I used a gray-tinted Kilz 2 primer because it’s the only primer I had in the house. The day before, Alaska’s governor mandated all citizens to remain in our homes as much as feasible. Somehow, a trip to the store for primer seemed extraneous given the circumstances, so I opted to use the primer I had on hand. My goal here was to, again, create a surface that will readily accept latex paint and adhere well. That’s primer’s job, regardless of its color.
- Once the primer dried, I applied two coats of Sherwin Williams Alabaster in semi-gloss.
- Finally, I reattached my newly upholstered seat to the bench frame and pulled it up to our dining table.

I don’t know if this will be its permanent home.
But I do know it’s already been a hit at supper the last two nights.
Some day, I want to look back on these unprecedented 6-8 weeks and know I intentionally grew and improved as a wife, mom, designer, and human being. Being creative and purposeful in my activities, as well as my family’s, is part of that process.
I would love to hear what you are doing in your homes right now, either alone or with your family. Together, we are making history. Let’s not waste this time.
Happy Decorating ~
Jaimee
**Where has this oil-painted bench been all these years? Check out this post from 2016 and see if you can find it.
 Alice in Wonderland Hutch
 Vintage Market ~ Sneak Peek
Love the new color and fabric on this bench! So many of us are working on home projects during this time. My kitchen, living and dining rooms just got painted 🤪 Next is my hallway! And who knows after that! I also love your perspective on using this time for some personal development. Blessings and stay safe!!😊😊
Thank you, Cindy! Wow, you are a busy woman painting away…I bet it feels so fresh and clean, just in time for spring. 🙂 What a strange, historic, beautiful time in the midst of pandemic. Hope you and your husband are staying healthy and enjoying the slower pace. Blessings, dear friend!