**This post contains affiliate links; however, opinions and suggestions are wholeheartedly my own.
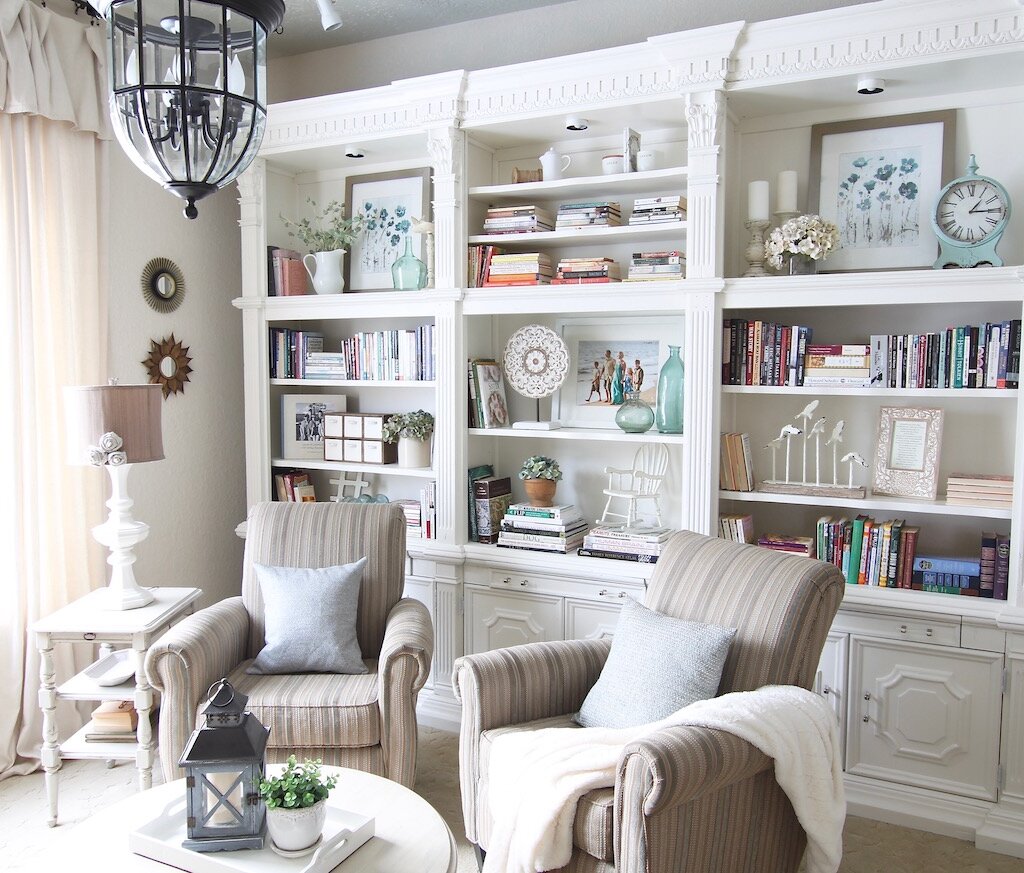
Painting my enormous library bookshelves presented a challenge in more ways than one. You can see my Full Reveal here.
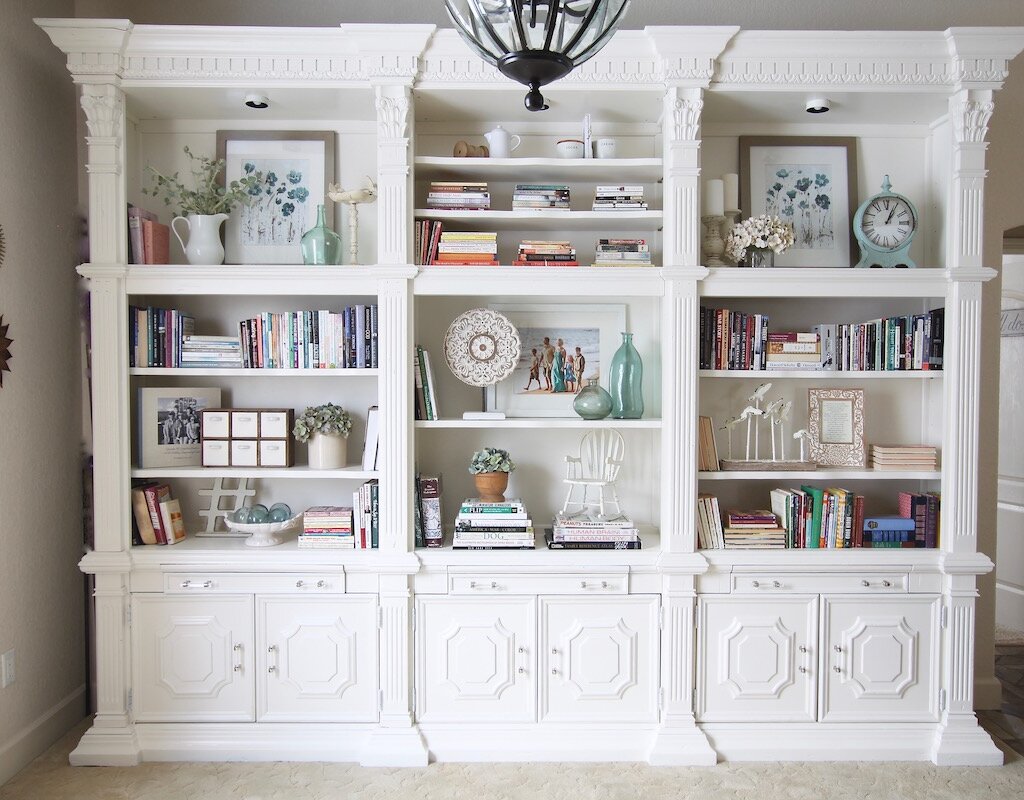
First, these shelves consist of three large parts which are extremely heavy. It took four strong men to move them to the space they currently sit.
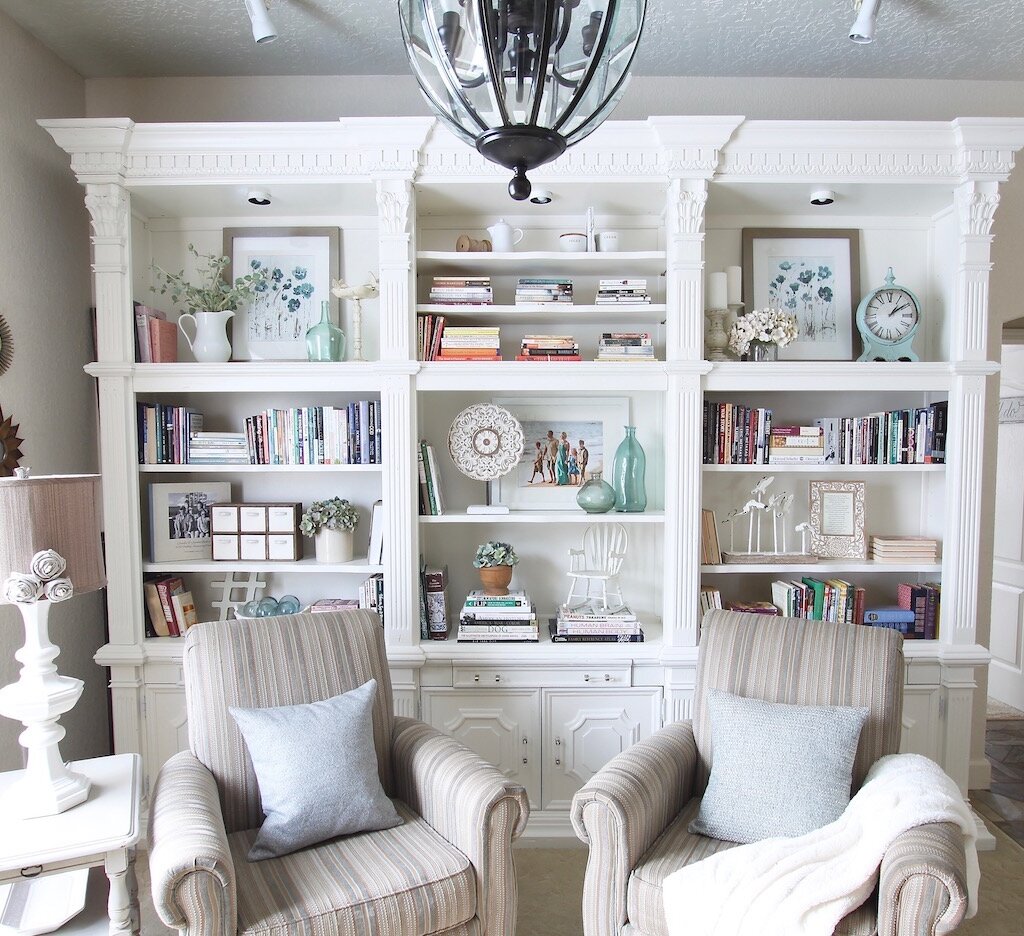
The bookshelves also reside on the second floor of our home, requiring movement down two stair flights to move them to our garage. We decided this was not a viable option for a few days’ paint job.
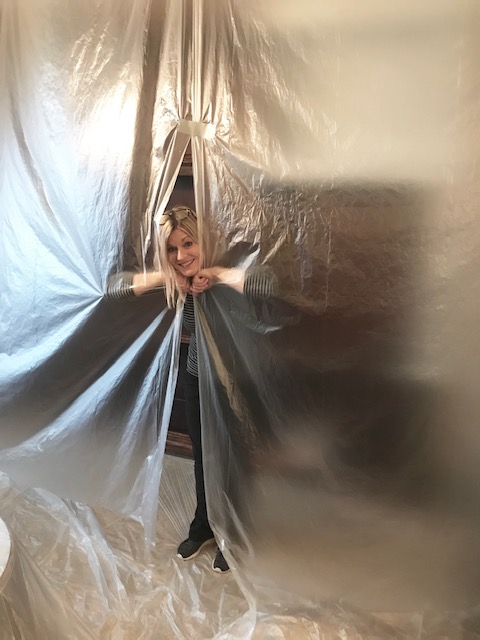
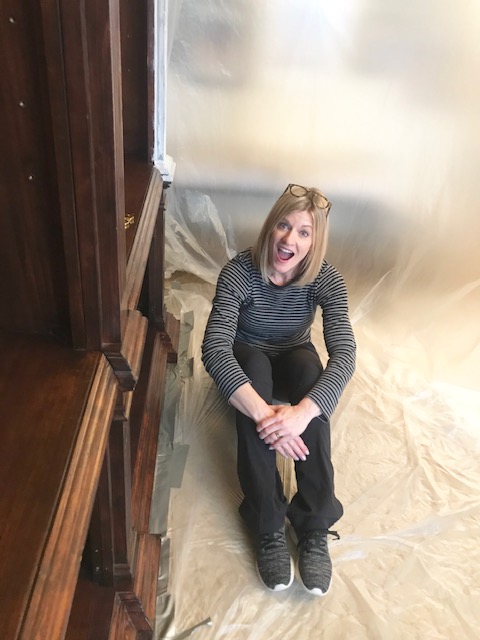
Instead, I decided to create a paint tent around the three large bases like so:
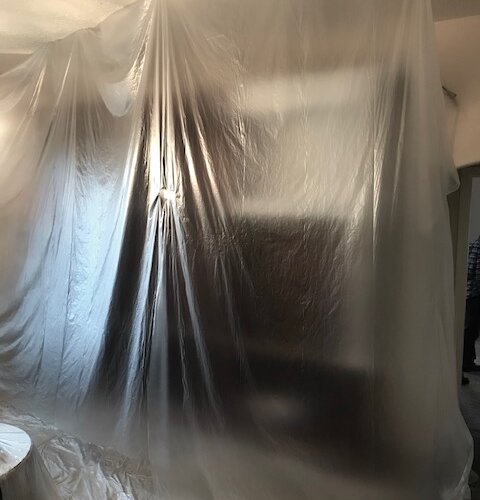
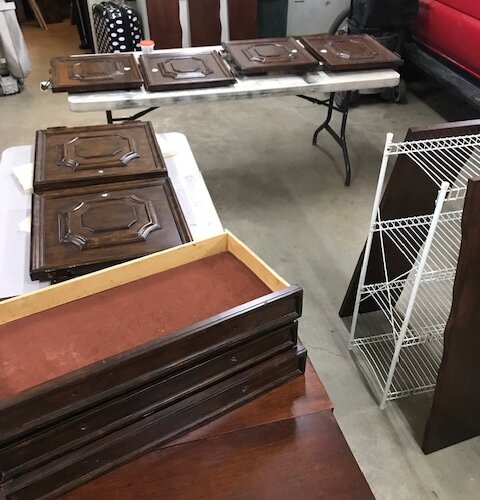
and simply (ha!) haul the 12 shelves, three drawers, six cupboard doors, and a partridge in a pear tree down to our garage. (This latter activity proved to be an effective leg workout going up and down the stairs numerous times.)
To create the paint tent, I purchased this box of plastic sheeting from Home Depot. It’s perfect for numerous applications in the home; I’ve used it often and it seems to last forever.
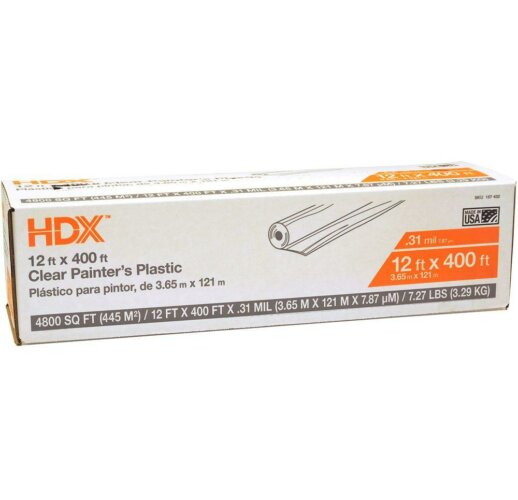
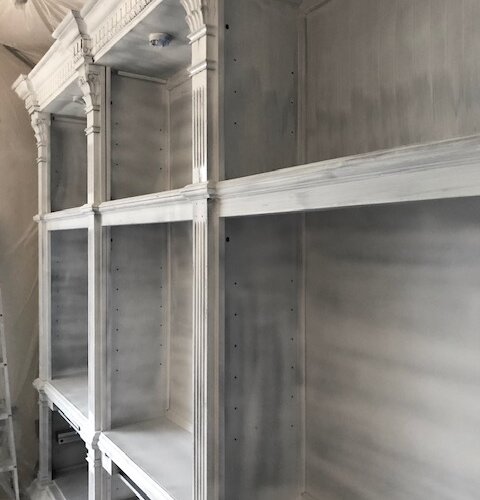
Using duct tape (can you believe I was out of painter’s tape?) and thumbtacks for the ceiling and walls, I proceeded to hang and affix long segments of plastic sheeting all around the base, top, and edges of the bookshelves, my goal being to cover anything that was NOT bookshelf (wall, carpet, ceiling, etc.) These photos below give you an idea how the finished product looked and how far back the tent was from the bookshelves, giving me ample room to stand inside the tent to apply paint.
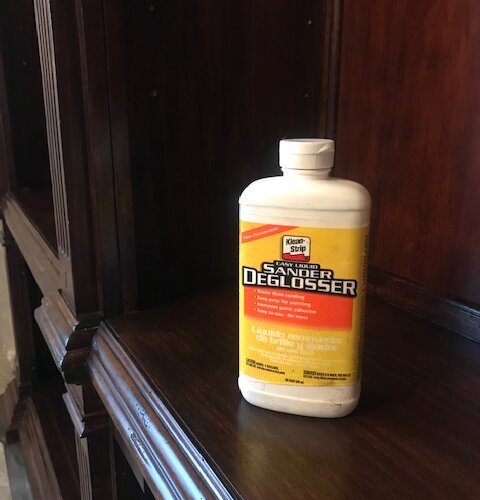
After double-checking all my edges and seams, I was ready to paint. But first, I went over all three bookshelf bases with a product called Liquid Sander. This product is a wonderful alternative to sanding for very large projects, chair spindles and turned legs, or if you simply cannot bear to sand one. more. thing. or you’ll go crazy. This product gently breaks down the gloss on furniture, giving it more “tooth” for better primer and paint adhesion. It dries in about 10 minutes, which is a nice perk as well.
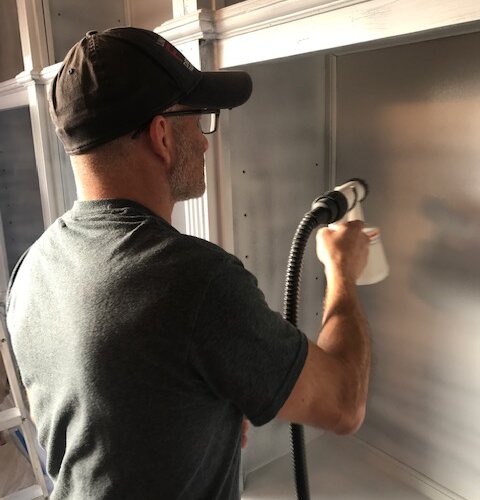
Finally, I pulled out my newish Wagner Home Decor paint sprayer we purchased for our Office Makeover cabinets, filled the plastic paint cup with Kilz primer, and primed the entire enormous piece in about 20 minutes.
After the primer was dry, I rinsed out the sprayer cup and refilled with Sherwin Williams ProClassic paint in Creamy, watering it down just a touch for ease of flow through our sprayer. Fireman was excited to help out…
…but unfortunately proved to be a rather messy painter, bless his overzealous heart. I took back the reins to finish spraying two coats on the bookshelves (with 4-5 hours’ drying time between coats).
Meanwhile, while waiting for coats to dry upstairs, I was also sanding, priming, and painting the shelving, cupboard doors, and drawers in our garage using the paint sprayer as well (that little gadget is proving to be worth its weight in gold, I tell you.)
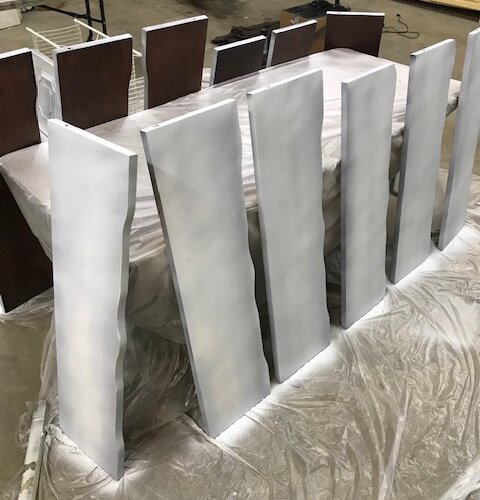
Again, the plastic sheeting came in handy for protecting our garage floor and prop tables.
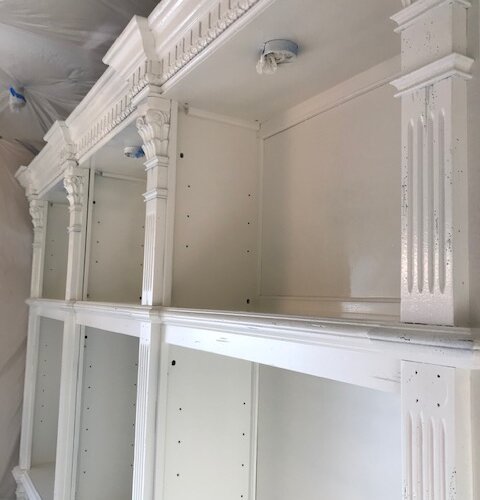
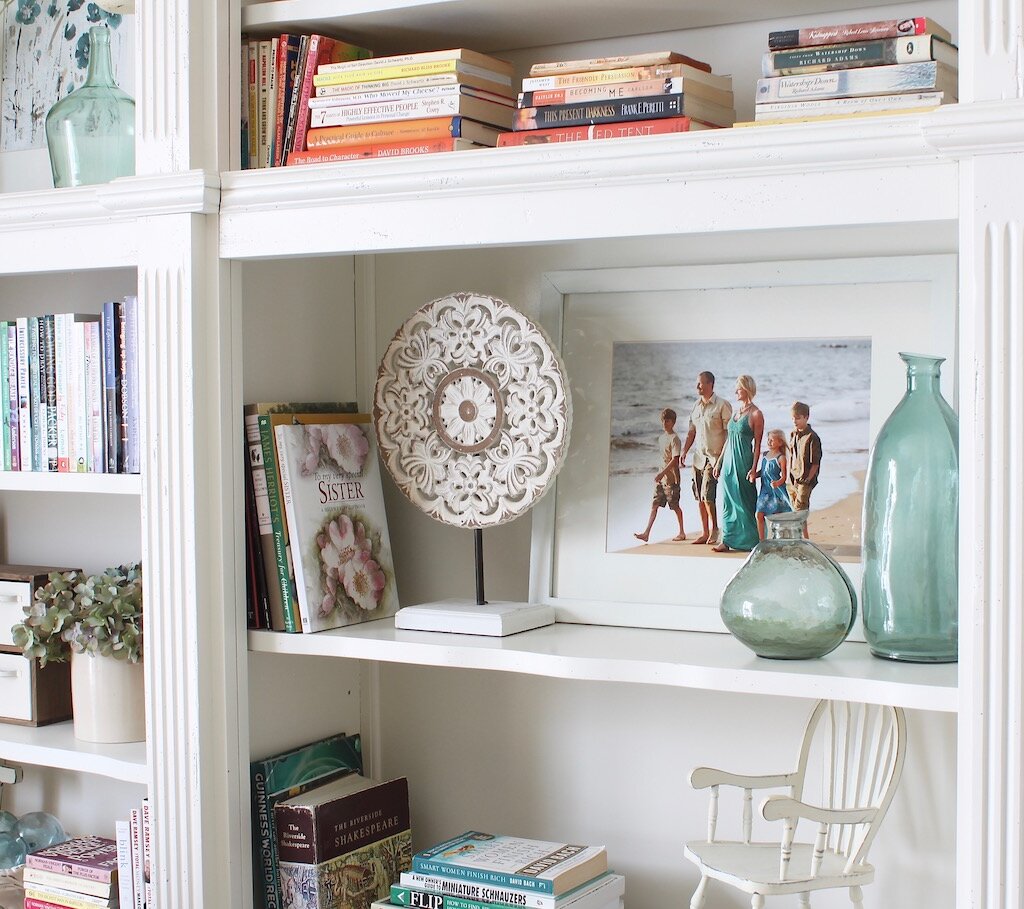
After two coats of paint and the application of these stunning acrylic pulls, I let the shelves sit for a few days before styling to allow the paint to cure and harden. (I did not apply a sealant to these shelves as the Sherwin Williams ProClassic line of paint hardens well and provides a great finish. Plus, these shelves will not get a lot of wear and tear.)
As for my fancy paint tent? I simply pulled it down, wadded the paint-splattered remains into a large ball, removed all tape and tacks, and threw the soiled plastic into the garbage. I was amazed how well it covered the carpet and our adjacent slate floor, as well as protected our painted walls and ceiling from splatter.
Would I make a paint tent again for a large furniture piece? Absolutely. It definitely worked as intended, was easy to both create and dismantle, and saved us from major furniture moving pains.
Make sure to let me know if you have any questions about this painting process. Happy Painting!
 DIY Chalkpaint Recipe
 Dining Area Updates ~ A Painted Railing & New Seat Covers
 A Blue Master Vanity