After typing this post title, I googled the definition of “hack” and found everything from “an untalented professional” to “a cough” to “an unlicensed taxicab driver.” And of course the more obvious: “A rough cut or blow.” Finally, after scrolling way, way down (that’s for you Shelli :)) I found what I was looking for:
“To change colour by painting or to make it do something other than its intended purpose. Normally with home decorations to suit your decor. Or to make things more useful.”
So that’s what this happy post is about. I hacked some bookshelves. If you’re new here, you may not know hacking furniture is a thing with me.
This particular hack involved a pair of cheap bookshelves, gray paint, peel-n-stick wallpaper, 1/4″ plywood backing, and a few nails. And a Fireman because he’s brave, kinda cute, and very handy.
Haven’t we all, at one point or another, purchased inexpensive bookshelves for our living room or office that looked something like this?
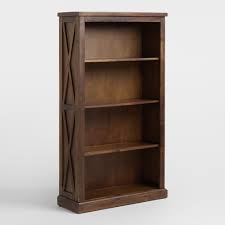
Courtesy of Wayfair
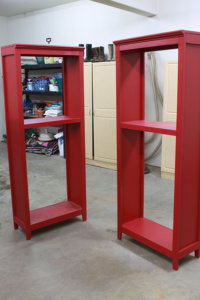
Once long ago, we owned a pair of shelves that looked like this, too, minus the pretty x’s on the side. It didn’t take long for us to prime and paint them red (SW Stolen Kiss ~ still one of my favorite reds) and to load them with pre-teen boy things in our son’s room several years ago. I had fully intended to plank the back of the shelves to look very farmhouse cool, so we removed the cheap cardboard-like backing to prep for my inspired cool feature….and it never happened. I simply never got back to it. Fast forward four years and the bookshelves were still very red…and still very backless. Safety alert: Do not load your son’s bookshelves with massive weight and then fail to attach the stabilizing back panels to them.
Just sayin’.
 A few weeks ago, we did a room refresh in our son’s space and opted for a more neutral color for these bookshelves, SW Mindful Gray. After removing the shelves, I painted the casings and shelving using a small foam roller and a 2″ Purdy paint brush to get around edges and smooth out roller dimples.
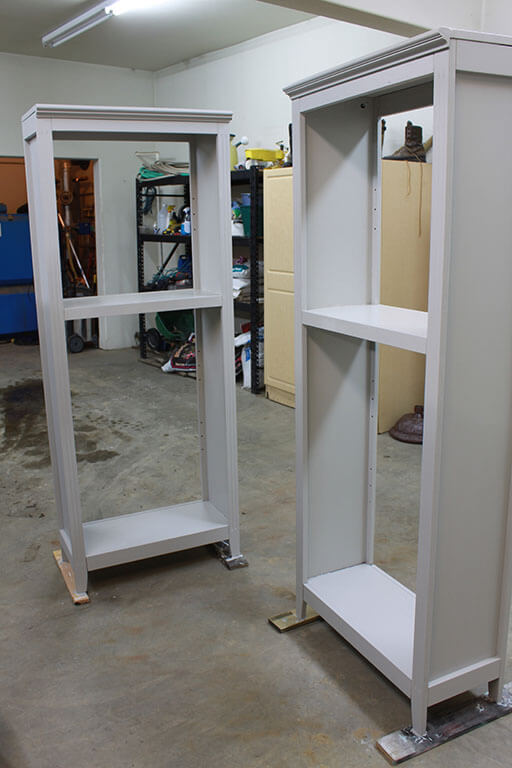
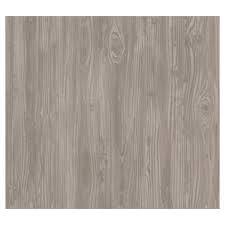
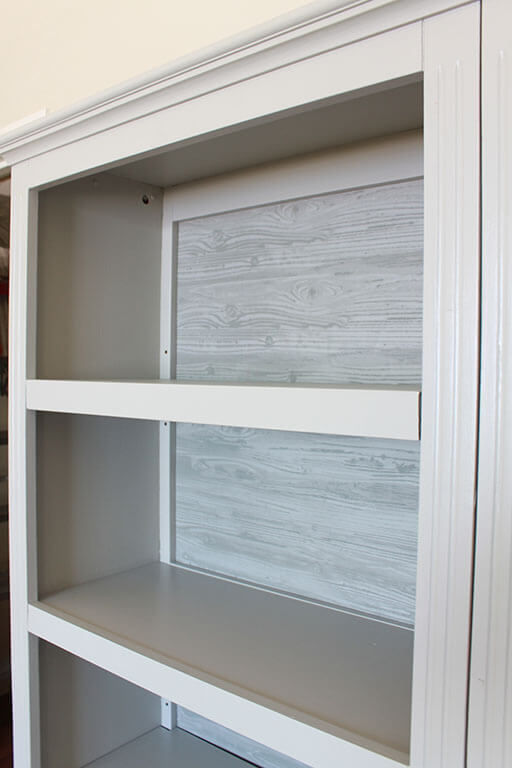
Meanwhile, in shop-ville, Fireman busied himself measuring and cutting a couple sheets of 1/4″ plywood to secure to the back of each shelving unit. This plywood backing, though flimsy on its own, provides structure and stability to a standing bookshelf and is an important part of the furniture piece (see previous sarcastic safety alert above). Because I am older and wiser now, I opted to not plank the bookshelves myself and instead hacked them (there’s that word again) with this Driftwood Textured Wallpaper from Target. It truly has all the feels.
I’m sorry I don’t have photos of Fireman and I cutting and peeling off the back of this wallpaper and adhering it to the 1/4″ plywood before nailing the plywood to the bookshelves. It was fun working together like old times and the application was primarily hassle-free ..the wallpaper was simple to adhere and would lift right up again if we needed to adjust and reapply. (Side note: For a humorous post an a time when applying adhesive did not go well, check out this post.)
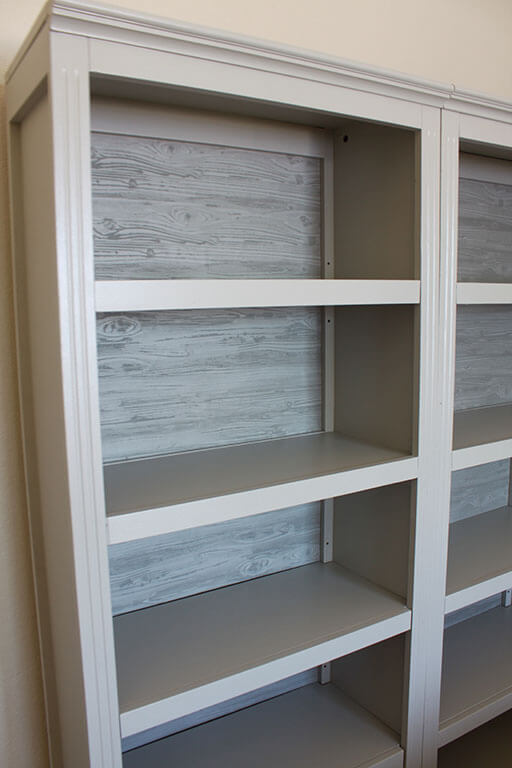
As stated before, we nailed the wallpapered plywood onto the backs of each bookshelf, and voila! Quite the transformation. I may have let out a squeal.
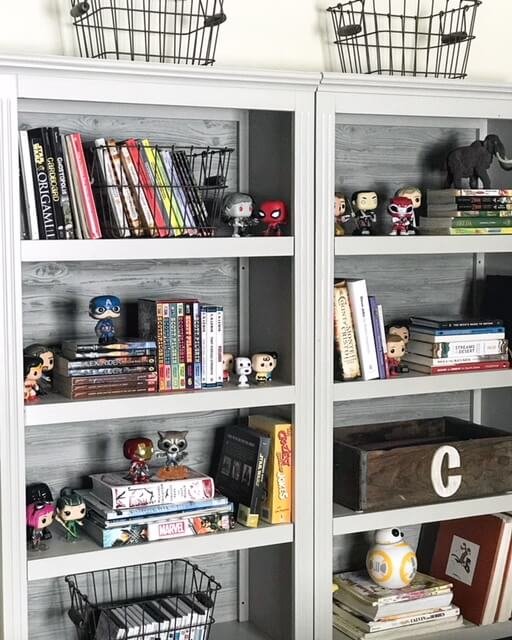
Perfect for all the things like a Scott Pilgrim series, Cardboard graphic novels, RIpley’s Believe it or Not, classic Calvin & Hobbes, ds games, boys-only books, and the illustrious (as in: well-known, respected, admired) Funko Pop collection you never even knew you needed.
Here’s to a tasteful hack that does not involve handkerchiefs (cough) or random acts of violence (rough cut or blow).
 Painting Kitchen Cabinets: More Details
 DIY Tomato Cage Christmas Tree
 Painted Gold & White Metal Desk