If you follow me on Instagram, you have seen glimpses of our newly wallpapered powder room. My goal last week was to finish styling this space so I could transition to other projects in good conscience. On any given day, my mind entertains a myriad of creative ideas and beckons me to numerous endeavors; it takes strength and discipline to finish one thing before moving on. However, I am seeing progress in this area. Every now and then I take my own chin in my hands and rotate my face back to the original project, not unlike my daughter used to when she longed for my full attention.
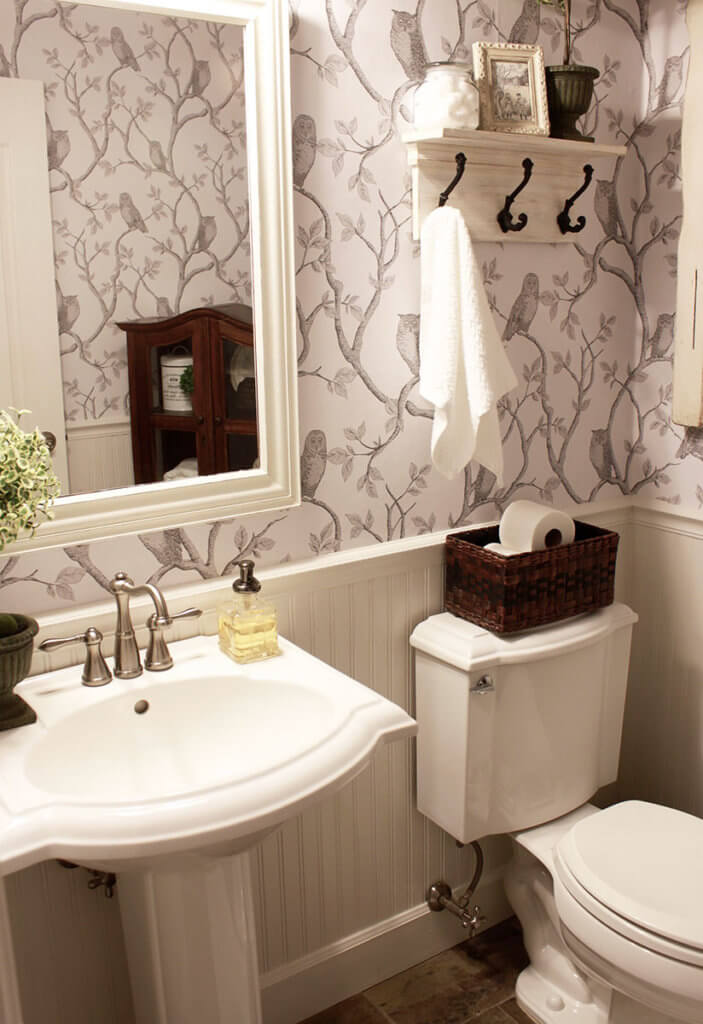
First off, squeal! This wallpaper is much more fun than I anticipated and has completely transformed our powder room. For those of you still uncertain about embracing wallpaper (“Isn’t wallpaper outdated?” you ask. Absolutely not.), I recommend testing wallpaper love in a small room first or perhaps on a statement wall so your commitment level is minimal. Start with a neutral tone in a subtle pattern, a great way to ease into this renewed trend in home design.
 I purchased four rolls of Owl and Tree paper from Lowe’s after measuring the square footage of my wall space (you can find the same wallpaper at Home Depot now as it seems to be no longer available at Lowe’s). Each roll covers about 56 sf.* I also purchased the only wallpaper paste Lowe’s carries in their store and it seemed to work fine for this application. I used an old paintbrush to apply the paste rather than spend money on an official wallpaper brush. For hanging tips and procedures, I followed the advice from BandQ on Youtube (video below), including positioning a prep table in our hallway for measuring, cutting, and pasting. I can’t recommend these videos enough!
From prepping, to hanging, to working around obstacles, I could not have asked for better tutorials on my first attempt at wallpapering. These guys helped me figure out little things like how to make sure the first wallpaper strip is completely straight (plumb line), how to carry the paper once pasted (accordian fold), where in the room to start papering (center of wall), and how to leave a little extra at the top and bottom to ease in the final trimming and placement (genius!).
 In the past when I tried something new, I would often jump in and figure things out as I went. I’m learning that taking a few moments to watch an instructional video can save huge amounts of time and heartache.
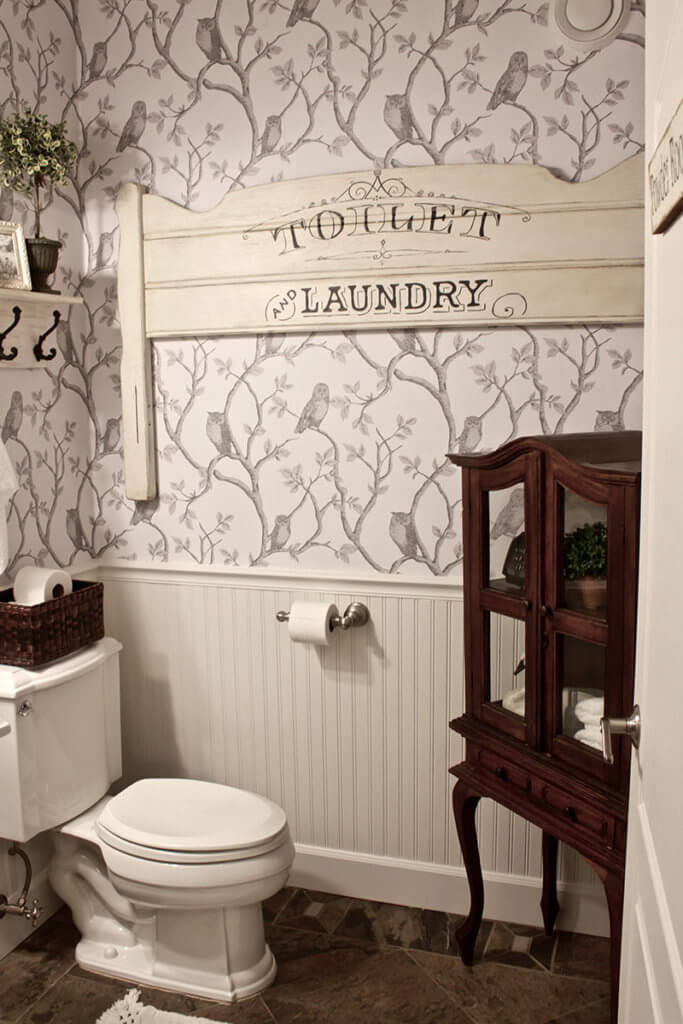
I did not install underlay beneath my paper and simply laid it over my textured sheetrock walls. For the most part, this was not a problem and the paper was thick enough to lay smooth. However, the wall right above the toilet was incredibly bumpy with texture. Fireman told me the mudding people (sheetrockers) did not “knock it down” enough. I ended up taking that strip down the next day, re-knocked the texture down myself with a sanding block, and reapplied a new strip of wallpaper. The original strip came down fairly easily with only a small bit of scraping required. I’m so glad I reapplied the new strip as the original bumps were obvious and would drive me crazy over time.
 It was tricky lining up the branches and leaves of the repeating pattern, and I probably wasted more paper than normal just working to match it. Seams could be tricky, too, and I did go back over a few areas once or twice pushing more paste under the edges with my old paint brush. As I worked around the room, I learned to be more intentional about pasting the very edges of each strip on my prep table in the hall to minimize backtracking.
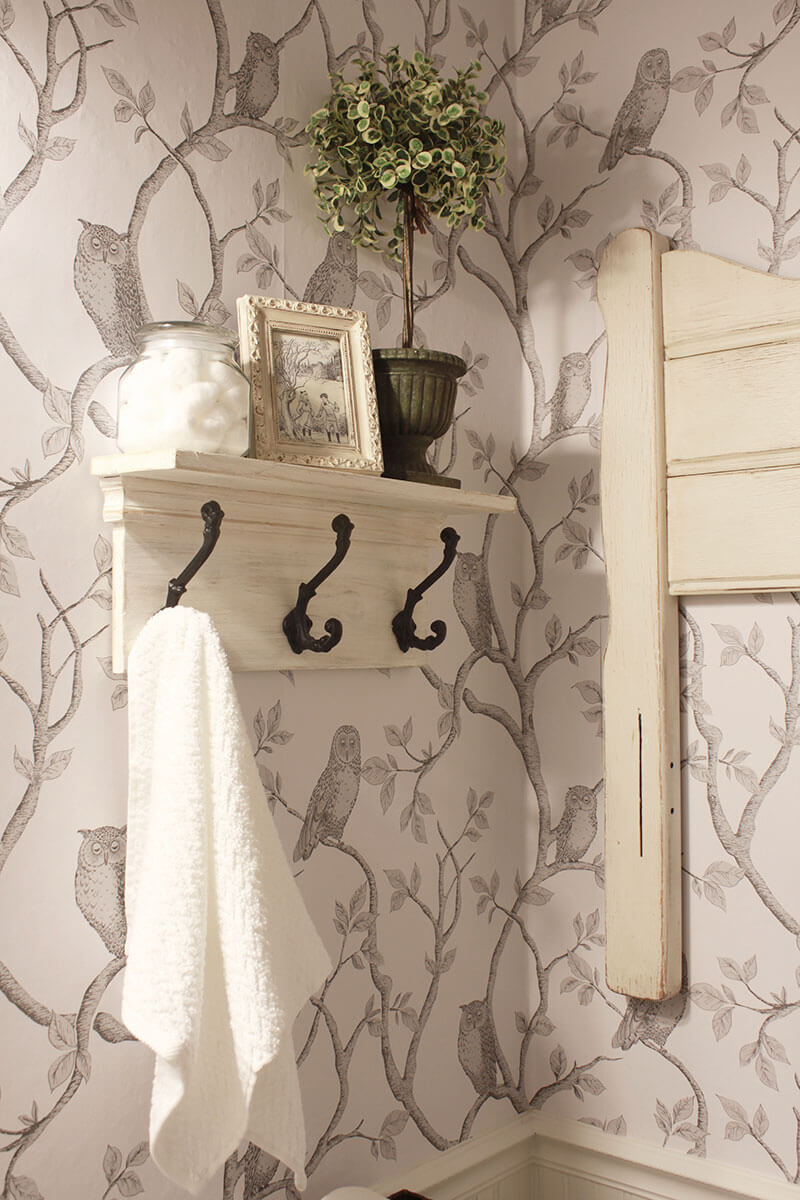
 The headboard below came from a family bedroom set and is decades old. I repainted it for this space and added the lettering. It’s an unexpected, whimsical touch that serves to make the space personal and unique. I will detail in another blog post where I found the vintage lettering and how I transferred the words to my headboard.
For fun, let’s look back on this powder room from the week we moved in several years ago.
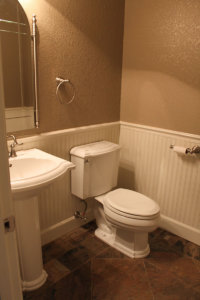 And after I painted it Farrow & Ball’s Cooking Apple Green. This was a beautiful color and the walls stayed this same green for many years.
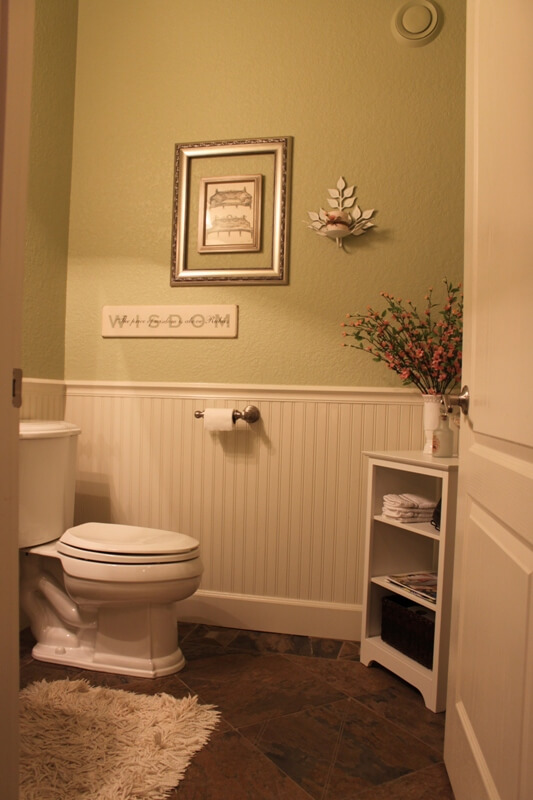 And for those of you following my blog for a long time, we would be remiss ~ would we not? ~ to omit the Power of Pink post in which I painted this little space the hottest, brightest pink I could find locally. Mercy. You’d have to see it to believe it 🙂
Wallpapering the powder room only increased my love of this look. I am already planning where to wallpaper next and will be ordering a couple rolls this week to install in our office later this summer. I plan to do a spa-blue floral print and am narrowing down my choices. If you still aren’t sure this look is for you, visit Jess Wasserman’s Instagram account to see examples of wallpaper throughout her farmhouse style home. Her feed inspired me to think differently about using this limitless feature in my home and I’m so glad I finally did.
Jaimee
*I originally ordered 3 rolls of wallpaper, but I reached the last wall and realized I was one strip short. What a bummer. I ended up ordering the 4th roll and had to wait a week for it to arrive. My recommendation? Order more than you think you need, then use the leftovers to paper the back of a bookshelf, linen closet, or hutch.
 DIY Upgraded Door Trim
 Authenticity….or Not
 Turquoise Dresser