The Studio is coming along and today I wanted to share more updates with you. Fireman and I were chuckling over our lunch break (me more so than him, I’m afraid) that when you observe room transformations online and on tv, the time frame from the Before to the After always seems to go so quickly. Well, we’re here to testify that room transformations are, in reality, many hours of often-tedious work that makes you feel like you’re not moving forward very quickly at all!
But we’re pressing on. Because in reality we’ve come SO far, and the little things that seem tedious are making are making a huge impact on our Studio space.
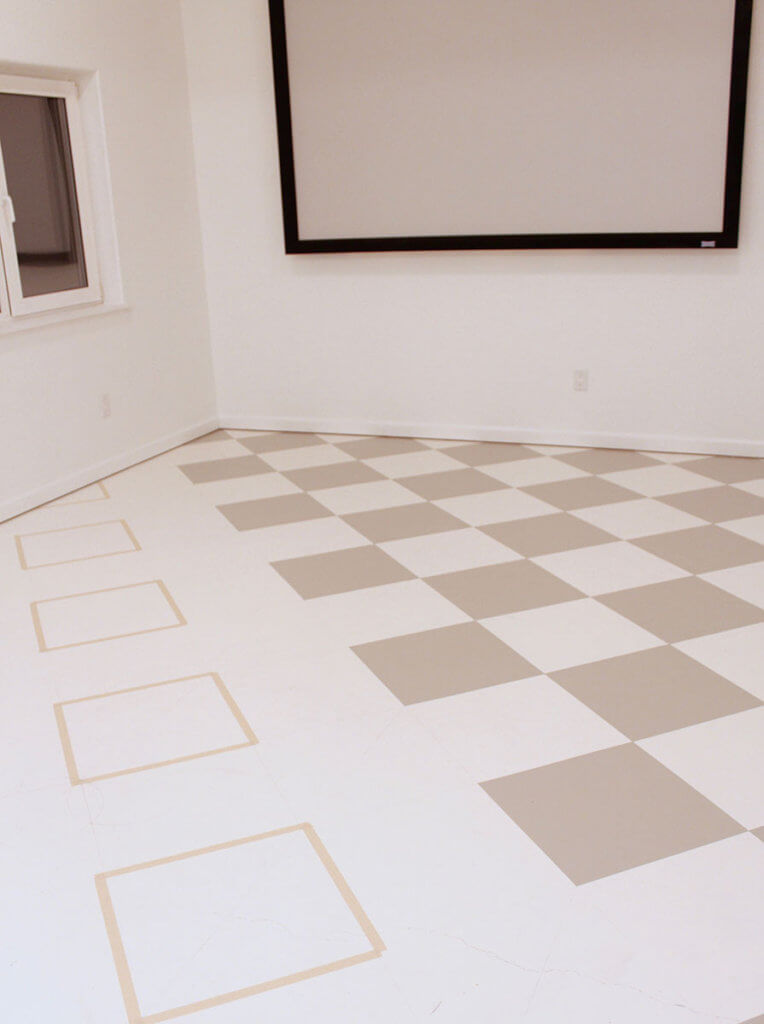
The biggest news is that we finished the diamond-pattern floor yesterday. I’m so tickled about it I honestly keep pinching myself. However, if you follow me in Instagram, you know that my first attempt last Friday at plotting out and painting the squares was an epic fail.
Without going into a lot of detail, I’ll blame a way-too-simplistic tutorial online that recommended finding the very center of the room, placing your square exactly over the center point, and tracing all the remaining squares from that set point.
Which is exactly what I did.
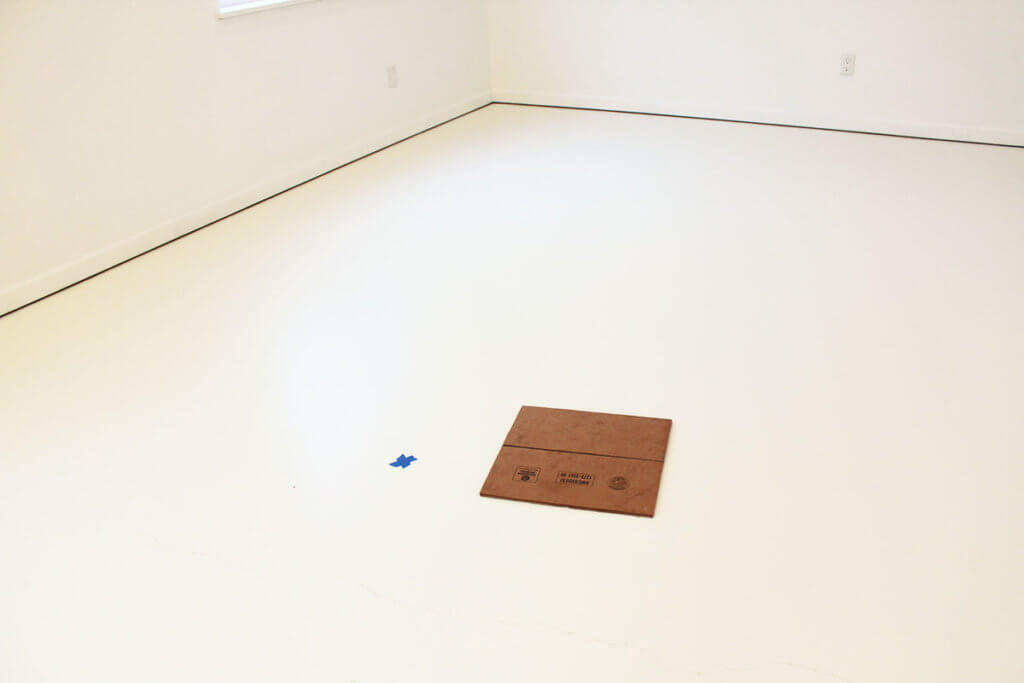
I traced around my cardboard square over and over and over, then proceeded to tape my squares over and over and over.
At this point, can I also blame an intriguing Focus on the Family Radio Broadcast about a woman who was part of the LGBT community, then started doing academic research on the evangelical community which inadvertently led to reading the Holy Bible through ~ in its entirety ~ FIVE WHOLE TIMES? According to Ms. Butterfield, you simply can’t spend five hours a day reading the Bible without huge transformation occurring within your heart.
And Ms. Butterfield’s testimony was so extremely powerful…….
…..and I was so completely caught up in her story of forgiveness and redemption and paradigm shift….
….that I DID NOT EVEN NOTICE that every last one of my squares was off-kilter. Until later.
I won’t even show you more pictures of those off-kilter squares because I don’t want to shame them any more than necessary. Or myself, for being so naively confident my project was progressing smoothly as I listened to podcasts in lala land and traced square after square after square without checking for precision.
When I did figure it out, I was devastated. Truly. All that work, and all my complete cluelessness! So I told my kids I was going straight to bed and I was not going to tell their father until morning (he was at work). I seriously considered just leaving them off-kilter, but I knew deep-down I would never be happy if I did. So by Saturday morning I knew what I had to do, and I proceeded to paint over the hours of work from the night before. Then, after a weekend of wrestling, and church, and Life Group, and house cleaning, and visits with friends, I enlisted Fireman’s help first thing Monday morning.
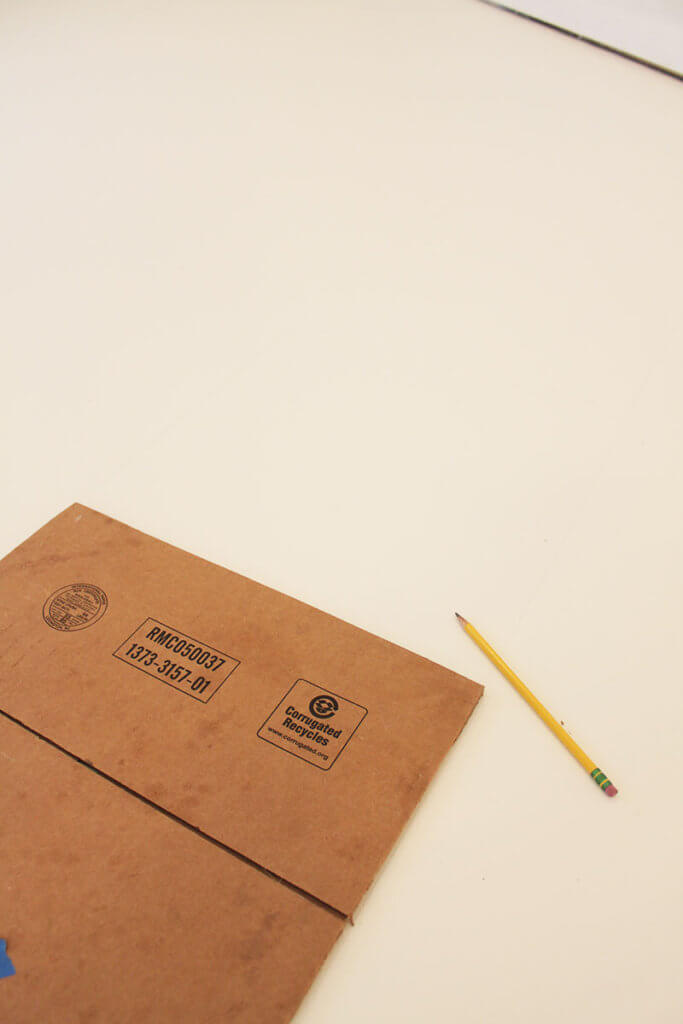
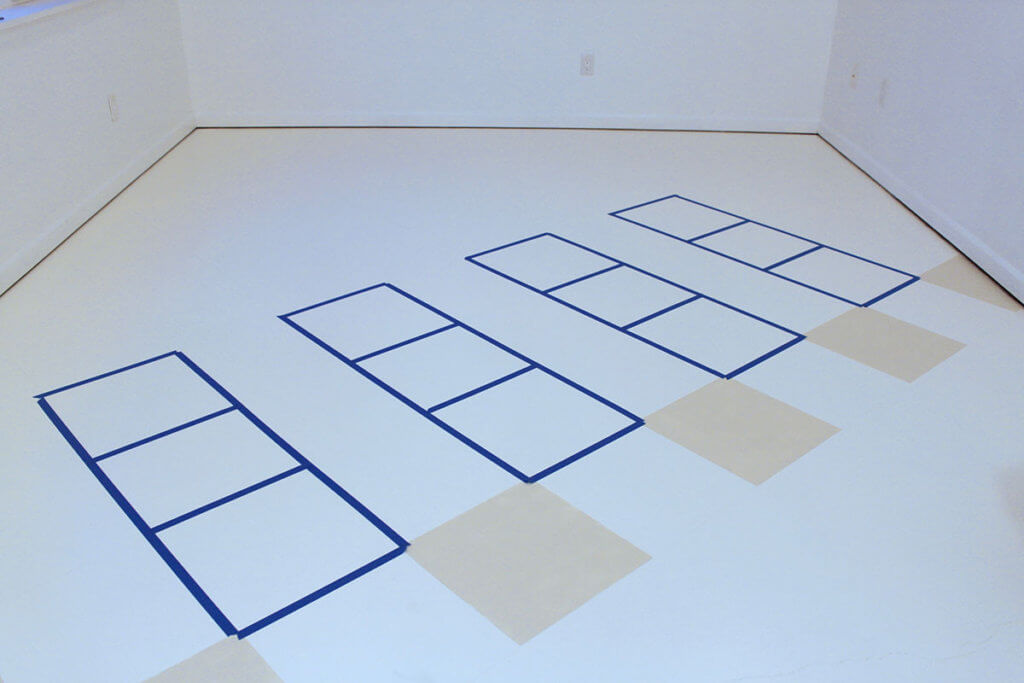
Honestly, I can’t tell you everything he did. I can tell you that he began, too, by plotting the very center of the room, and from there he proceeded to plot “true” lines all over the floor, making a large grid pattern with a pencil, so that as we worked we could continually check the integrity of the pattern. And he used math.
And he also cut out a precise 1/4″ piece of plywood to use as our square template instead of cardboard. Which was probably a much wiser idea.
The final results were SO worth all that math.
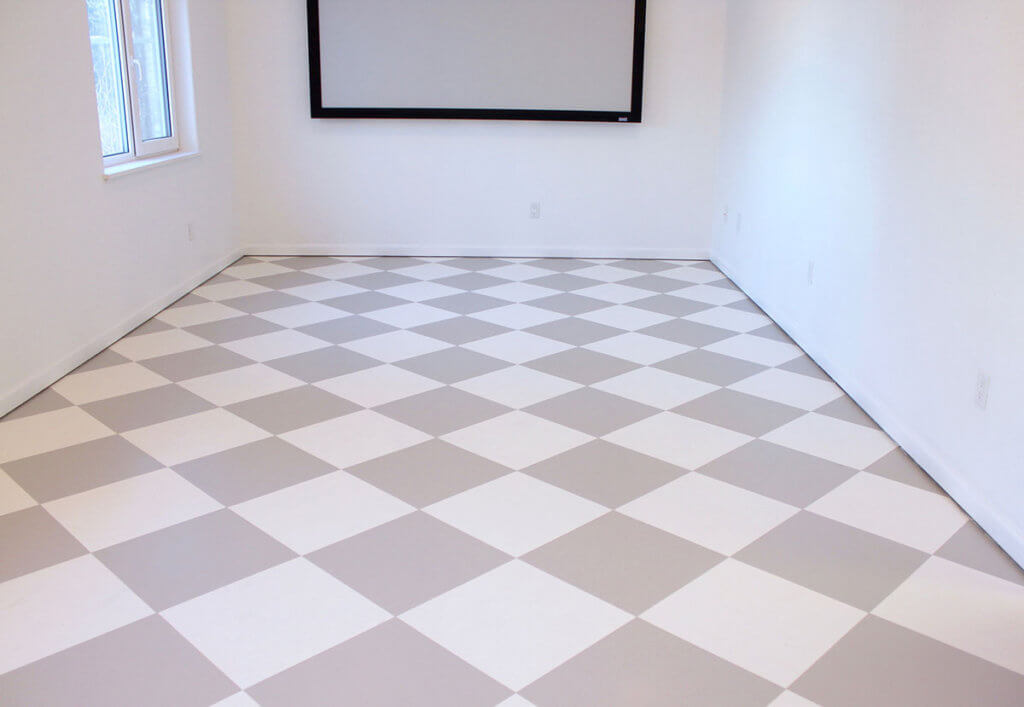
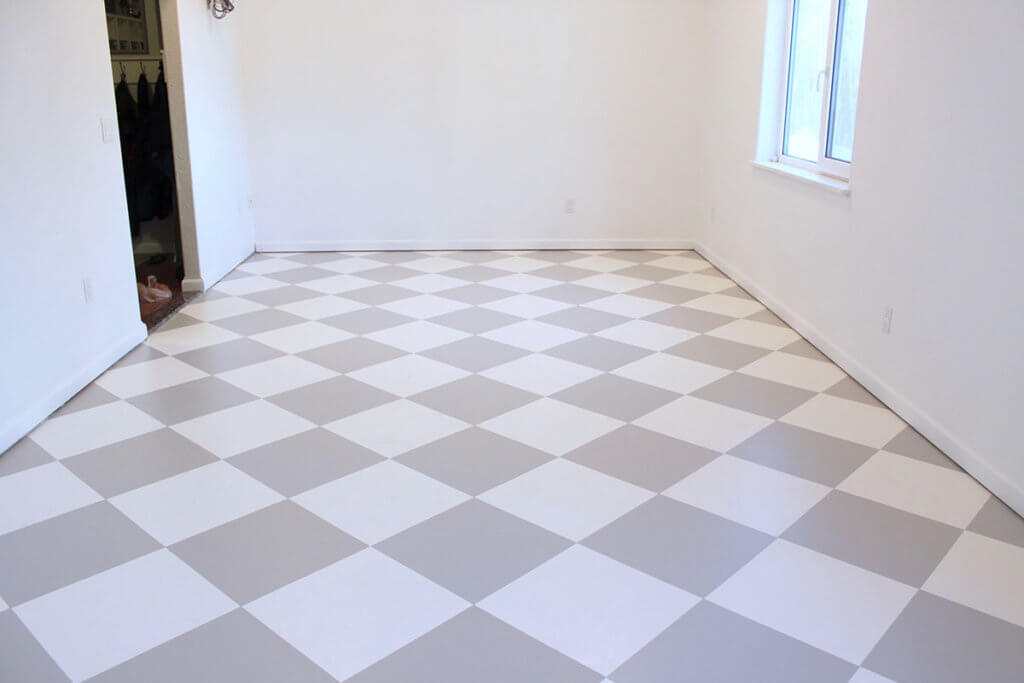
In hindsight, though, it turned out to be blessing redoing these squares because I changed two things the second go-around (well, three if you count using more math): I enlarged the squares from 16″ to 18″, and I also changed the diamond color from SW Wool Skein to SW Mindful Gray.
Both of these choices made the redo worth it, and I absolutely love it.
Today, Fireman is installing quarter-round trim along the bottom of the existing base trim to cover the gap left from the original carpet.
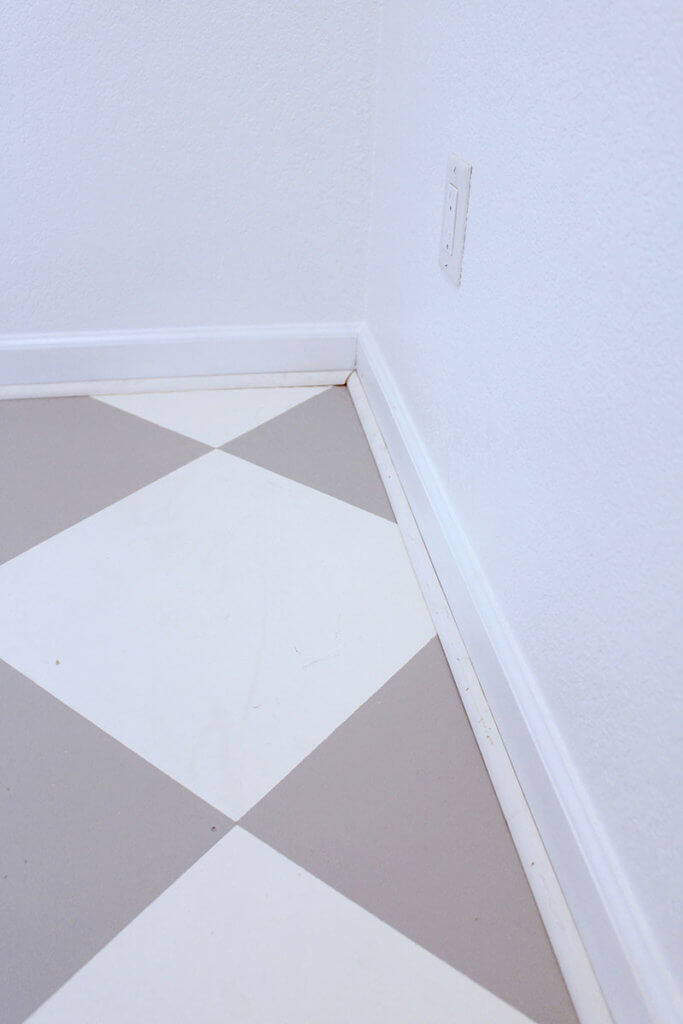
He is not enjoying this project very much. I keep telling him how much I LOVE it (which I do!) and I keep reminding him that in all the old homes years ago, this last trim piece was standard install (it’s called a “shoe”) and what a shame no one automatically finishes off millwork in new homes like this anymore. Fireman said he, for one, can certainly understand why they don’t…:-) Then I asked him if he would mind someday adding “shoe” to all the baseboards in our entire house, because in my heart of hearts I’ve always thought that would look SO beautiful?? (He thought I was kidding but I wasn’t.)
It’s important to assist him in keeping this one-room task in perspective.
Of course, as we all know, when you add trim, you also add to your workload because finishing trim involves filling all nail holes, caulking the seams, and painting it all white. Again, tedious, but it will be worth it.
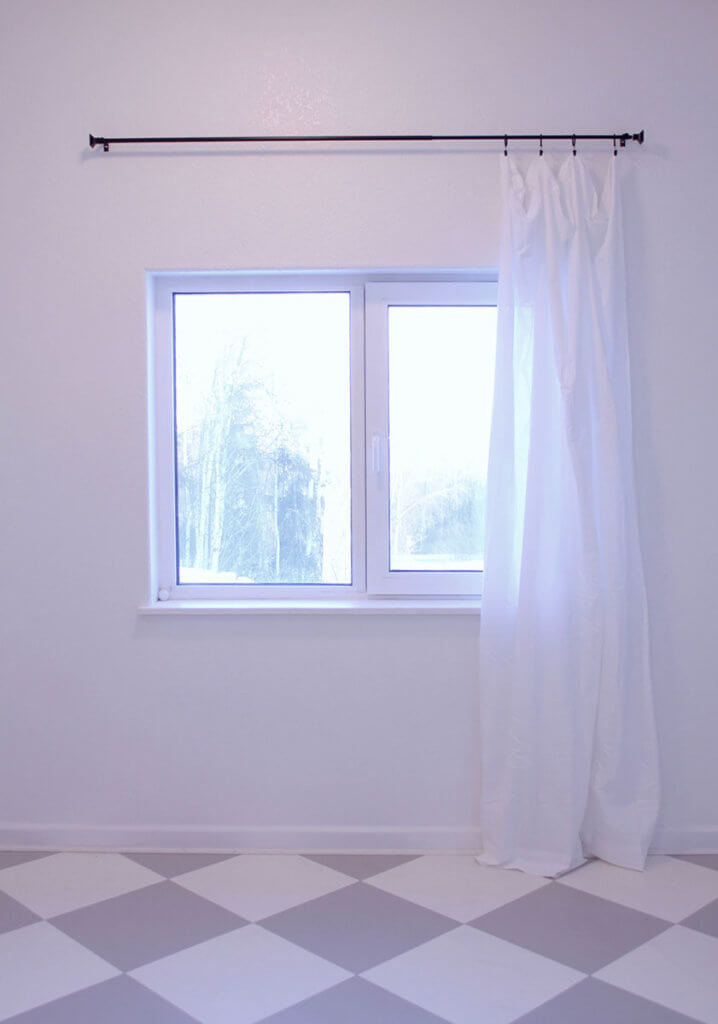
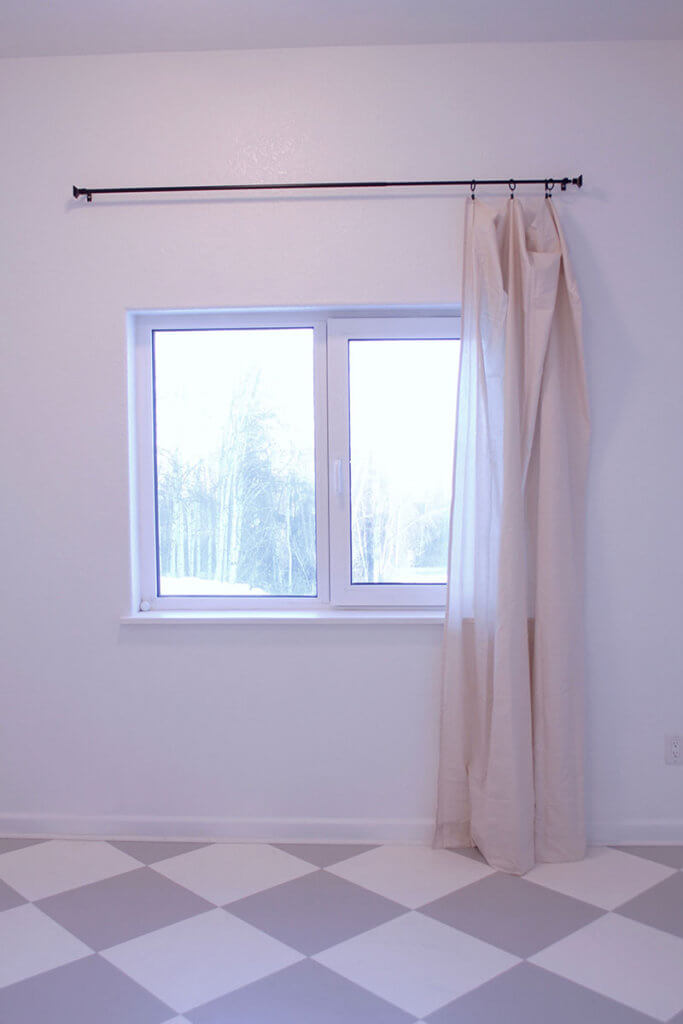
So while Fireman was working on trim, my job was to hang curtain rods and figure out what to do for curtains. Trying to be economical, I purchased inexpensive rods from Walmart and then, because they were completely out of white twin flat sheets there, I purchased one white twin sheet from Fred Meyer, and one in a color I will call “ecru” because it’s not really cream. (Have you ever used sheets for curtain panels? These are $6 apiece, work great for lengths over the standard 84″, and are already hemmed!)
Then I hung both colors up to consider. First, the white:
 Then, the ecru:
Unfortunately, I don’t think either one will work, and here’s why.
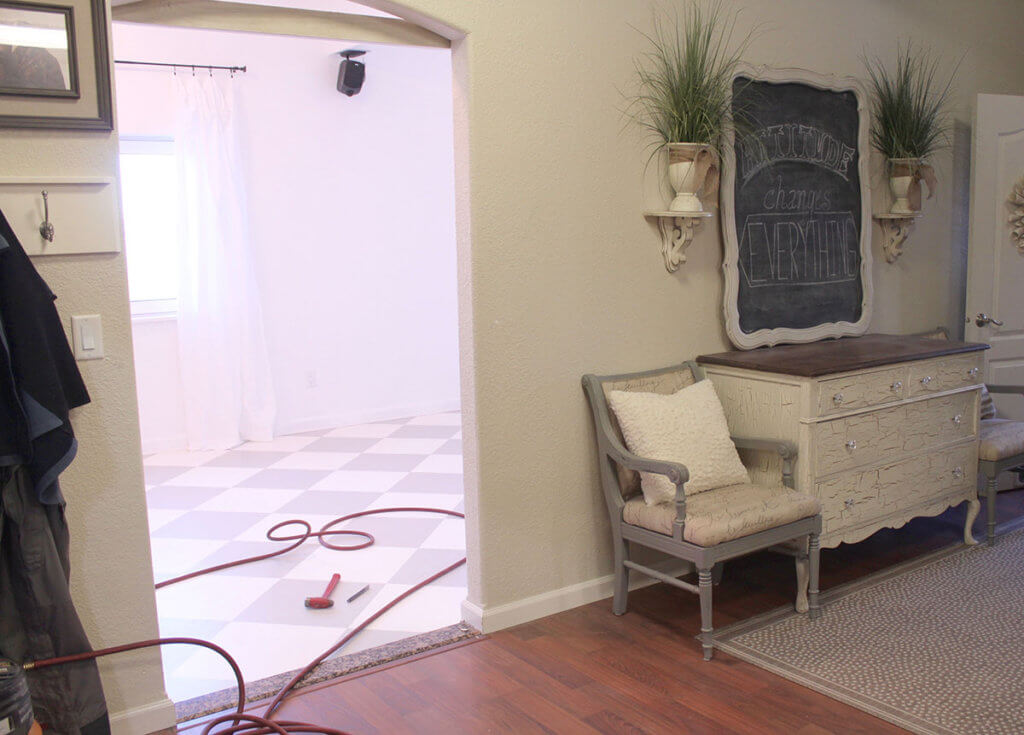
The room outside the studio is our passageway from the garage, and also our part of our downstairs family room. The wall color is SW Wool Skein (which is why I originally chose that color for the squares) and, similar to the rest of our home, there are a lot of creamy neutrals in this space (pardon the air compressor hose).
 I opted to paint the Studio white because I know I will be taking furniture pictures in there and I wanted clean, crisp light as well as an airy, open feeling. However, I opted to paint the floor in a creamy white (SW Creamy) to tie in with the creams in the adjoining spaces.
In this photo, the light in the Studio looks very pink because of the bulbs that are in the light fixtures (those will be changed out eventually), but you can already see that the white panel is way too crisp and white to tie in nicely with the outer room.
(The creamy squares on the Studio floor are almost identical to the ivory pillow in the chair, and the door you see is also painted SW Creamy.)
For some reason, every time I look at the ecru-colored panel, all I see is women’s underthings. I can’t get past it. Furthermore, the color does not go with the SW Mindful Gray squares at all.
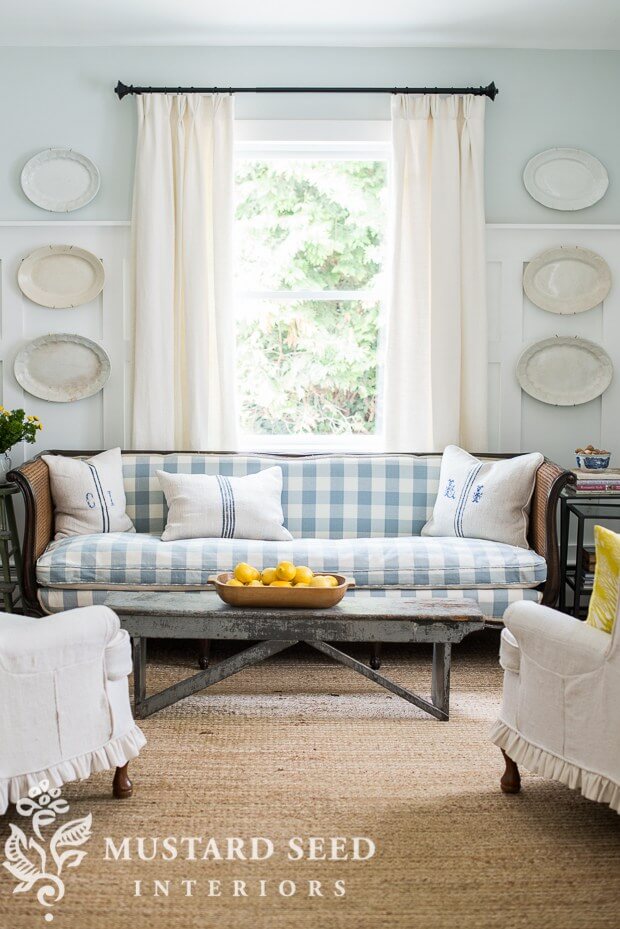
So I’m going to keep looking. I had hoped to find cream-colored twin sheets because I think that would be a nice bridge between the floor, the white walls, and the adjoining space. Today, I came across this picture of Miss Mustard Seed’s drapes and I think it’s a great example of mixing whites and creams.
 So I will keep looking and keep you posted.
Lastly, we are simultaneously crafting a work table to go in this space and I wanted to show a few progress pictures before I go.
I originally bought this handmade table locally for $40 for use in our school room (this is an old picture…the table’s been painted white for awhile now):

Last week I painted the apron and legs black, and this week, Fireman added castors to the legs. Next, he cut (4) 2×8 and (1) 2×4 pine boards to fit the top of the table (overhanging just over an inch on each side) with screws from underneath.
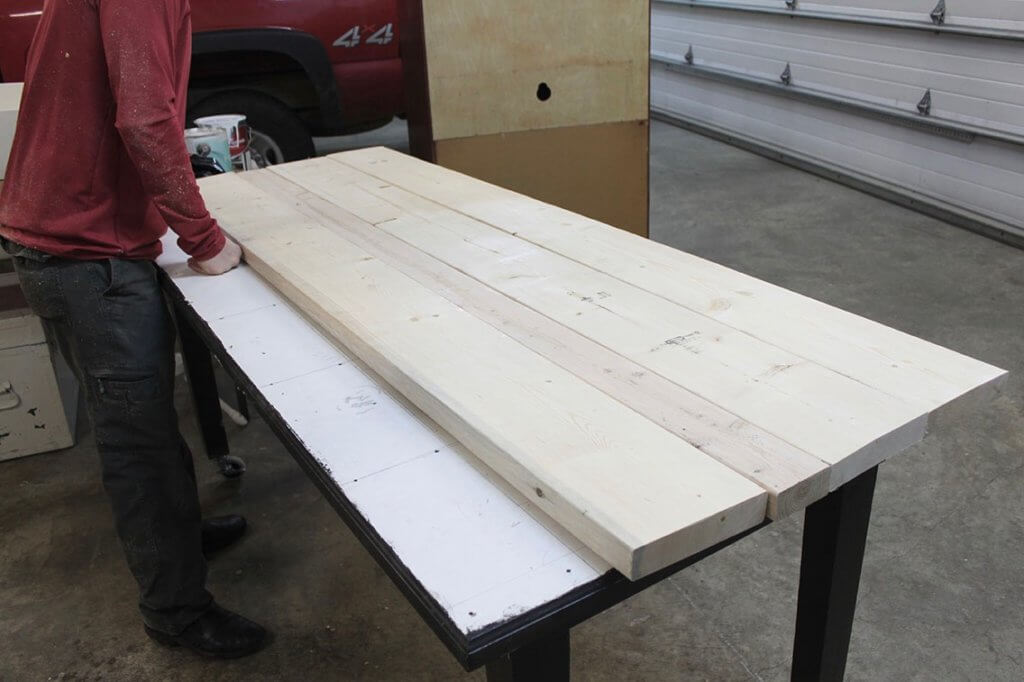
Now the table looks like this:
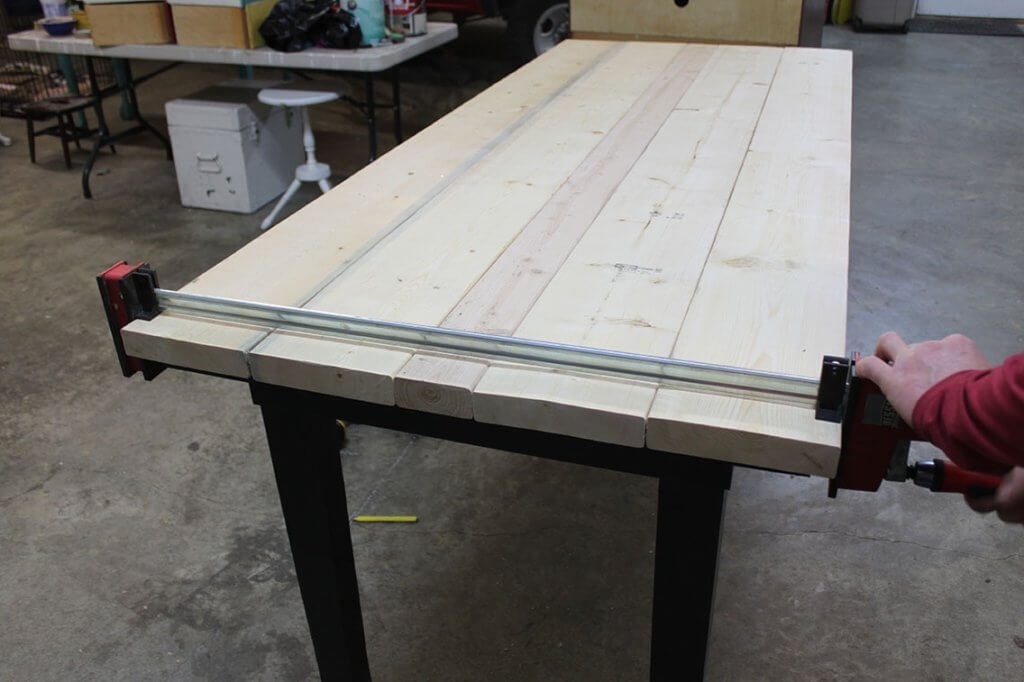 Next I plan to do some gray-washing over the black to give it an old, layered look, and I will stain the boards on top, too. I’m so excited about this table! Fireman told me today he’s already loving the castors feature since he’s been using it in the garage today as he’s measuring and cutting “shoe.”
More details on the table to come, but it’s always fun to see in-process pictures, isn’t it?
Happy Wednesday to you!
 A Home Studio Tour
 This Isn’t What I Pictured
 Living Room Thoughts