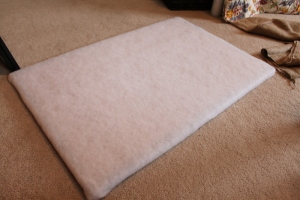
Once I cut the batting to allow for edges folded over, I got really technical and used packing tape to secure it. Hey, why not? It was on hand, it boasts incredible adhesion value, and (real reason) I had no clue what else to use in its place.
The wrapped bullet board then looked like this:
Next, I went downstairs and dug out an old burlap sack our family used two falls ago for gunny sack races at our annual fall party.
Which, by the way, we haven’t had this year. I started to plan our fall party and grew immediately discouraged because my younger sister who loves fall parties the most moved 300 miles away in September and won’t be at the party with her three energy-lovin’ kiddos. Sniff.
I’m still sad about it and haven’t found the heart to continue planning. Angel, you feel like driving up for our annual fall party in the next week or two? I promise to serve your favorite hot spiced beverage and to massage your crazy-toed feet in front of my gas fireplace…..
And then, once I cut open the sack, I discovered leaves left behind from the aforementioned race!
Sniff again.
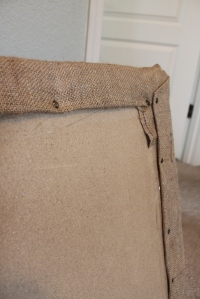
But I quickly overcame my sentiments and pressed forward with my project at hand. After cutting the burlap just like I did the batting, with edges for folding over, I spritzed the front of the board (burlap) with a water bottle since it had so many wrinkles in it. Then I pulled it tight & secured the burlap with several upholstery tacks. I honestly thought these would be too long and would poke through the other side, but they worked great and never came through the front.
Next, I flipped the board over and began punching upholstery tacks all around the edges. This was not for function but for eye candy only ~ a very, very important part of any project I pursue. And yes, I had a measuring tape with me at all moments to make sure my “guesses” were based on some semblance of accuracy. My lines aren’t always straight, but at least the tacks look evenly spaced.
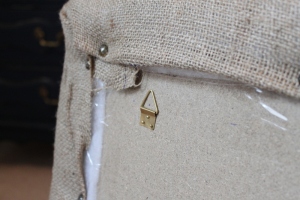
Lastly, I discovered I covered up the corner hanging brackets when I wrapped the board, but thanks to my handy-dandy catch-all tin in my odds & ends drawer *, I rounded up two brass hanging brackets, nailed them on with the tiniest nails you ever did see, and the board is ready to hang.
*Now I must tell you a funny thing about my mother. Did you notice my reference above to an odds & ends drawer? It has come to my attention over the years that most people have one of these in their homes; however, those people most often refer to this drawer as a JUNK drawer.
But not our family. Oh no, my mom was a stickler when it came to talk that proceeded from our young mouths. And the word JUNK? That word simply does not sound nice. She doesn’t like it. JUNK, according to my mother, is plain negative and not worth repeating. But “odds & ends”?…..Now there’s a much better term, and probably more precise, too, don’t you think?
Ahhh, euphemisms. I think everyone in my family learned early on how to make things sound better than they really are. Which certainly has its time and place. However, the older I get the more I value hearing the plain and simple truth ~ no holds barred.
And I think it’s safe to say my mom has become more that way, too.
Although she still won’t call it a JUNK drawer.
Stay tuned tomorrow for an amazing contraption my welding husband crafted for me the other day. I’m still in awe ~
Jaimee




 Studio Updates
 Authenticity….or Not
 Inevitably, A Wrinkle

How easy! I got a kick out of your 'junk' drawer discussion. 🙂