Hello, dear friends…..I hope you enjoyed the comfort of close relationships and satisfaction of delectable food during your 4th of July celebration yesterday. We spent the last couple nights camping at one of our favorite places, Chatanika River, and in spite of continual downpours throughout our stay, we stayed dry and warm in my parents’ motorhome. One of my favorite memories already is playing Rummikub with the smell of baking lasagna wafting through the RV…
We worked on the yard upon our return today and I’m tickled because I finally planted some begonias on the northern side of our house. I then weeded like crazy, trimmed, mowed part of the lawn (my eleven year old is becoming an amazing mower in his own right)…and now my back and arms have that feel-good ache of a job well done. I love coming back inside after spending a day working in the yard, kicking my cowboy boots off just inside the door. It feels right, like a good day on the farm, I suppose.
But no pictures of the yard yet 🙂 I must show some pics of our mostly finished Isaac’s room. (After my last post, Mr. Wonderful was a bit hurt that I did not show more detail work of our board and batten treatment, especially in light of a particular cut on the boards themselves. So I promised I would tout his craftsmanship in this post.)
Here is the picture I showed you in my last post of the board and batten treatment:
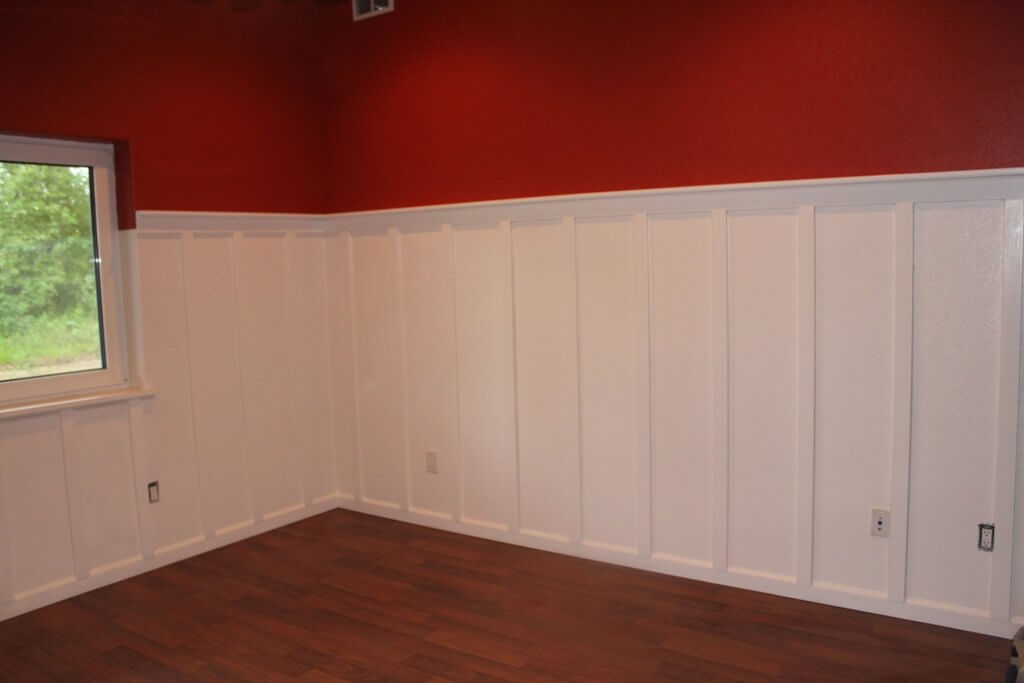
Now any authentic board and batten craftsman would tell you we did not do an authentic treatment on this wall. A more accurate treatment would have included a smooth sheet of 1/4″ paneling nailed behind the vertical boards, covering the bottom segment of the wall and hiding the textured sheetrock. The vertical boards would then be applied over the panels. We opted to delete this paneling from our treatment for two reasons: 1) It would take a lot more work to cut the panels as we accommodated lightswitches, outlets, and windows/doors. 2) Because it was a kid’s room, we were not as concerned with authenticity as, say, a more public dining room. This was our first go-round with board and batten, and we certainly didn’t want to wear ourselves out, so we simply glued and nailed the boards to the textured wall.
How to handle the base trim when doing a board and batten treatment can be challenging because of the common difference in thickness between the vertical boards and the base trim. Some people leave an overhang and don’t worry about it; others do an angle cut on the vertical board to gradually fade into the base board; still others rip out the existing base trim and install new that accommodates the thickness of the vertical board.
Our problem was not so much a thickness difference, but an end cut difference.
So what did we do? Well, my amazing Mr. Wonderful embraced the challenge much more enthusiastically than I. He studied the base trim, which has a couple detailed cuts, and then he headed off to his table saw to see what he could do.

And this is the final result:

Pretty amazing fit if you ask me.
Our vertical boards were 2 1/2″ wide, and we measured approximately 12″ between each board, fudging here and there when the measurements weren’t going to come out exactly right based on the wall width. We applied Liquid Nail to the back of the boards first, then used our new brad nailer to secure them in place (can’t wait to use this nailer again!):

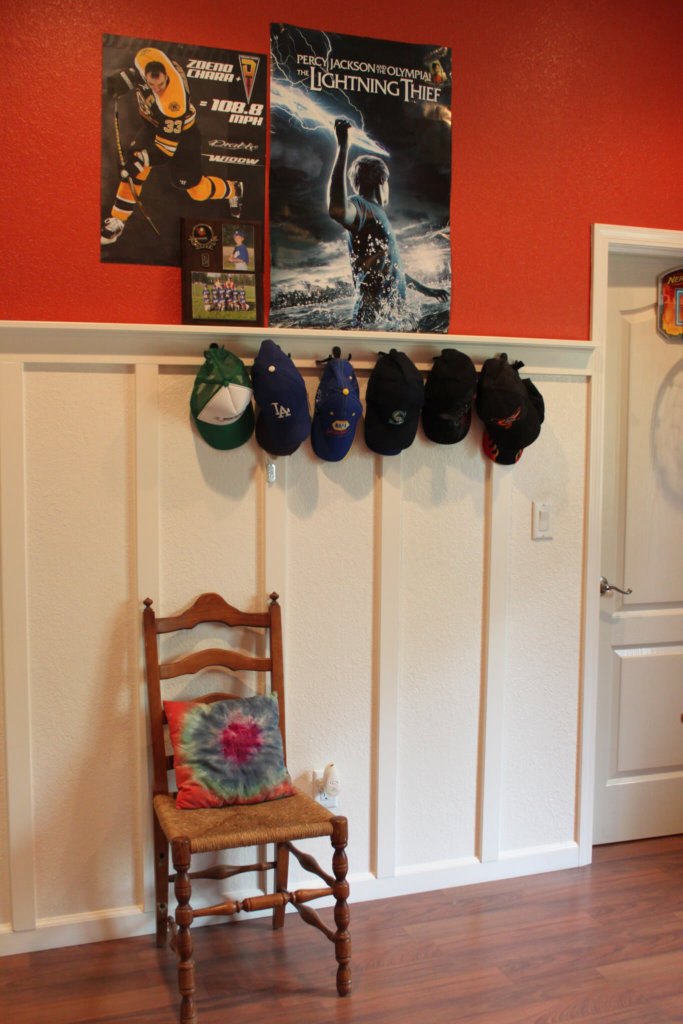
Here you can see how we applied a 3 1/2″ top shelf and cove molding below to give the treatment a more finished look…as well as to provide a display shelf for Isaac’s knick-knacks, pictures, baseballs, etc. All the materials we used were mdf, pre-primed. Oh yeah.


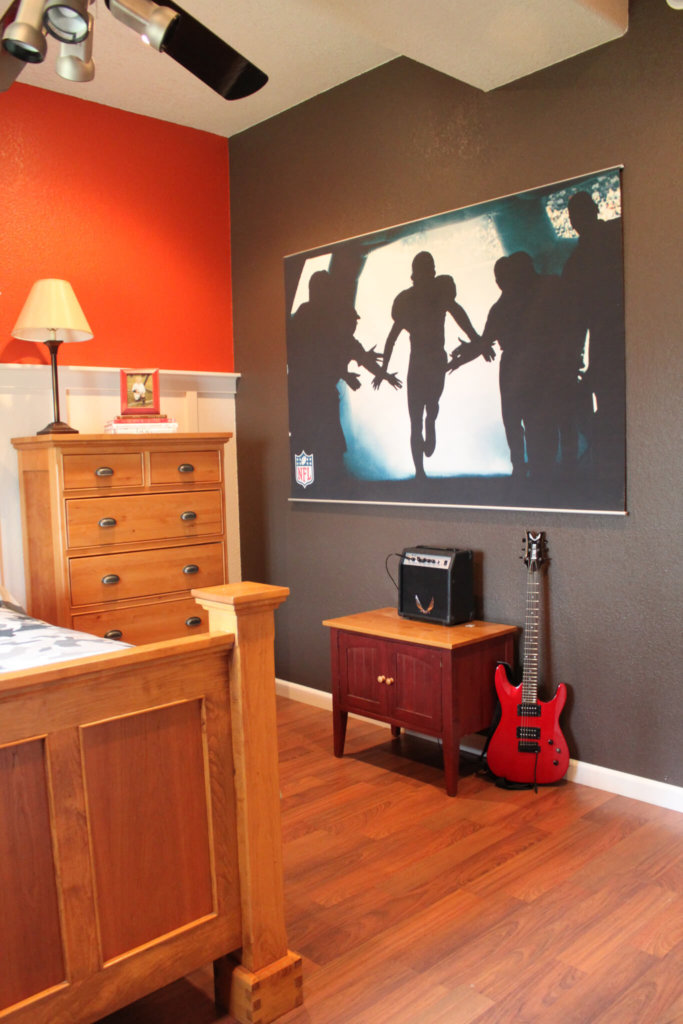
He received a spiffy new spray-paint job with Krylon’s Brown Leather, and now he’s lookin’ pretty dapper:


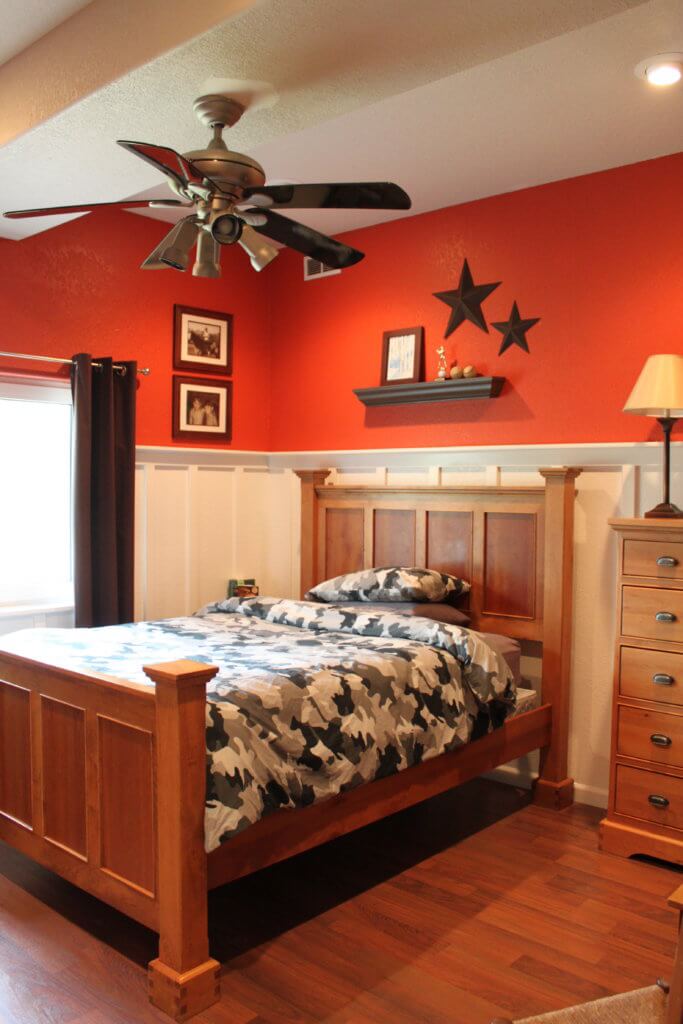
And now the After, freshly painted with some architectural detail, a room perfect for an almost-tween boy:
 As one of my favorite HGTV personalities, Candace Olsen of Divine Design, would say:
“Now that, my friends, is Divine” 🙂
Okay, not really, but we’re as close as we’re gonna get! Does anyone else find it difficult accessorizing children’s rooms? It’s not like I can grab a candle stick or potted plant to fill a space…..kids’ rooms require a bit more creativity, I’m finding. But at least we have the bulk of the room done, and we can take some time to discover Isaac’s style and taste as we accessorize and complete from here. I would much rather the room reflect him than me, wouldn’t you?
Blessings!
Jaimee
 Yes, I Do Home Design!
 Painting Kitchen Cabinets: More Details
 My Best Tip for Avoiding Pinterest Overwhelm
I think this is just right, and on the practical side he can grow up in this room as it is not too childish. I think your man on “board” is brilliant, luckily I have one too.
Way to go, Greg! Those are some pretty great cuts along the baseboard. I nearly bust out laughing at the sight of the alarm clock – I can't believe its still alive! Do they even make alarms like that anymore, you know with the obnoxious “EEHHHH! EEHHHH! EEHHHH!” to wake you up? Now, where can I do some board and batten? Perhaps in my bedroom remodel?
Turned out great, Jaimee! I love the football mural!